This guide explains how to move a WordPress site (blog, web page) to a Loopia account. You can use it whether you are moving from another web host or transferring a site between two Loopia accounts. The steps cover backing up files and the database, configuring the domain in the Loopia Customer Zone, uploading via FTP, and updating the database.
1. Download a local backup of the site
To move your WordPress site, you need to download both the files and the database. If the site is hosted elsewhere, contact that provider’s support for help.
If the site is on a Loopia account, do the following:
2. Configure the domain name
The domain name you want to move your WordPress site to must use the UNIX configuration for WordPress to work. To change it:
- Log in to the Loopia Customer Zone.
- Click the domain you want to move the site to.
- Select the configuration Website with Loopia (new platform) or Website with Loopia, click UNIX and press Save.
Configure a media subdomain
If your current site was installed using our One Click Installer, it probably has a separate subdomain for media files (images, videos and so on), such as media.example.com. This subdomain must also be configured in the Customer Zone.
- On the right side of the Customer Zone under Add/Create, click Sub domains.
- Select your new domain name in the list and enter media in the New sub domain field.
- Click Add.
- Click the new subdomain and change the configuration to Autobahn, then click Save.
3. Upload the files
- Log in using FTP.
- Upload the WordPress files into the folder yourdomain.com/public_html.
- If you have configured a new media subdomain (see above), upload the media files to media.example.com/public_html.
4. Configure WP Super Cache
If the original site was installed via our One Click Installer, you may need to edit one file so that the WP Super Cache plugin (add-on) works correctly after the move.
Open wp-content/wp-cache-config.php and find the $cache_path line. If the file does not exist, you can skip this section.

This path must be updated with the absolute cache path. If you do not know your account’s absolute cache path, contact us at support@loopia.se to obtain it.
In some cases you must also update wp-content/advanced-cache.php if an absolute path is listed there:
if ( !include_once( '/www/webvolxx/xx/xxxxxxxxxxxxxxx/example.com/public_html/wp-content/plugins/wp-super-cache/' . 'wp-cache-phase1.php' ) ) {
    if ( !@is_file( '/www/webvolxx/xx/xxxxxxxxxxxxxxx/example.com/public_html/wp-content/plugins/wp-super-cache/' . 'wp-cache-phase1.php' ) ) {
Note that this absolute path is different from the cache path above. If you do not know your account’s absolute path, contact us at support@loopia.se to get it.
5. Import and connect the database
Use the database file you exported in step 1.
- Create a new MySQL database and user.
- Import the database file.
- Update the database connection in WordPress.
6. Update domain references in the database
The last step is to replace the old domain name with the new one inside the database. If the domain name stays the same (for example, when you are only moving between providers), you can skip this step.
This change can be made with a script you can download here. The download is a .ZIP file; extract it on your computer with any program that supports ZIP files, or right-click the file and select Extract All. The resulting folder (Search-Replace-DB-master) can then be uploaded to your FTP.
- Log in to your FTP account and place the folder under yourdomain.com/public_html. Then open the script in your browser; in this example, the URL will be http://example.com/Search-Replace-DB-master.
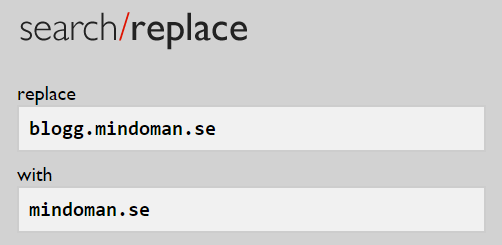
- Enter your old domain under replace and your new one under with.
- Click live run to apply the changes.

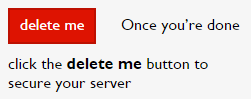
- Finally, click delete me to remove the script. Leaving it on the server is a security risk.