With WordPress, the world’s most popular website tool, you can build everything from homepages, news feeds and blogs to complex portals and company sites. WordPress is easy to use and almost endlessly customisable, so you can design your website exactly the way you want it. Welcome to the WordPress school! In this series we go through everything you need to know to get started with your own WordPress website. In this first part you will learn how to install WordPress and publish your first post.
1. Install WordPress
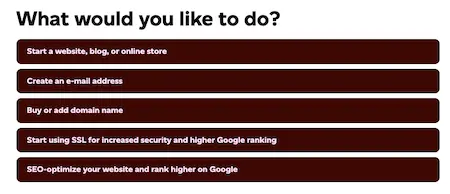
The first thing to do is order a domain name and one of our web hosting packages, which include WordPress. Once the domain and web hosting have been ordered and paid for, your login details for the Loopia Customer Zone are sent to the email address you entered with your order. Now it is time to install WordPress.
- Under the heading “What would you like to do?” in the Loopia Customer Zone, click Start a website, blog or online store.
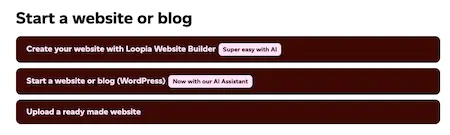
2. Click Start a website or blog (WordPress).
3. You will now be asked to fill in some information.
- Name your website: the title of your WordPress site. You can change this afterwards if you change your mind.
- Username and password: the credentials you want to use to log in to the WordPress admin panel (admin area, wp-admin), where you change and add content.
- Email address: the email address that should receive notifications, for example if you forget your password and need to reset it.
- Install location: choose whether to install WordPress on your existing domain (for example yourwordpress.com), on a subdomain (for example wordpress.yourwordpress.com) or in a new folder (for example yourwordpress.com/wordpress).
4. Once you have filled in the information and chosen where to install WordPress, click Install.
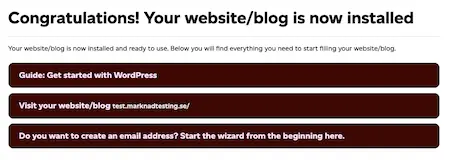
Congratulations – you have installed WordPress!
You can view your new WordPress page by browsing to the address you selected in the previous step, or by clicking Visit your website/blog in the box that appears. Please note that it may take a few hours before your WordPress page is available.
In future you log in by:
- adding /wp-admin to the end of your web address in the browser (for example yourwordpress.com/wp-admin), or
- clicking your WordPress site’s name in the Loopia Customer Zone under the heading “Services”.
2. Create a post in WordPress
You can use WordPress to build almost anything you want – a website, a blog, a news feed or something else entirely. Here we walk through how to publish content using the default theme (template) that comes with your WordPress installation.
We will now take a closer look at the WordPress admin panel (admin area, wp-admin). You will spend a lot of time here, as it is where you change the look and content of your website. In later parts of the school you will get to know the admin panel even better and, among other things, learn how to create a static front page.
Create the post
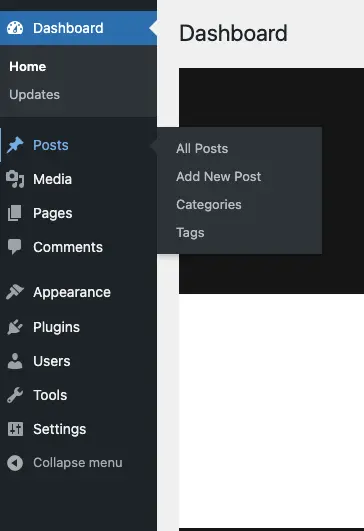
Start by logging in to WordPress, either through the Loopia Customer Zone or by adding /wp-admin to the end of your URL.
Then click Posts → Add New Post in the main menu on the left. You will now enter the post editor.
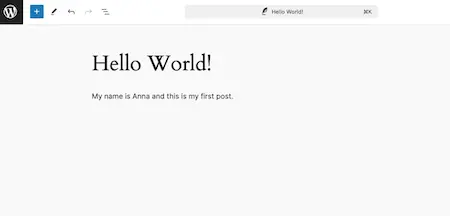
Insert text
At the top of the post you can add a heading, the title of the post. Below the heading you add the text the post should contain. You decide how long or short the text should be, and you can also leave it out entirely – for example if you only want to insert a large image.
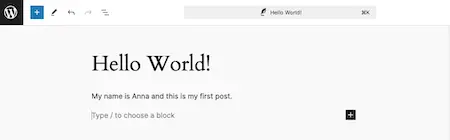
Insert an image
There are two easy ways to insert an image:
- Type /image directly into the post.
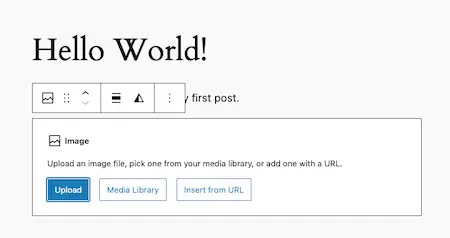
- Click the plus sign, either to the right of the line in the post or at the top left of the toolbar, then click Image. You may need to search for the block first by clicking Browse all.
An image panel then opens in your post. From here you can upload a new image to the post and your media library, choose an existing image from the media library, or insert an image by URL. We recommend keeping your uploaded images as small as possible to optimise page speed, for example by using the WebP image format.
When you select an image you have several optional settings. In the media library you can fill in alt text (which improves digital accessibility), a title, caption and description. In the right-hand column of the post itself you can also choose a style and change the shape, size and resolution by clicking an image in the post.
Additional settings
Before you publish your post and share your thoughts with the world, there are a few more tweaks that add an extra edge.

Categories
Look at the right-hand column of the post, where you will find the categories on your WordPress site. A clear category structure makes it easier for your visitors to find specific posts.
You can add new categories by clicking Add new category. Enter a suitable category name, optionally select a parent category and click Add new category.
To add the post to a category, tick the category or categories it belongs in. It is fine to use several categories for one post, but try to stick to a small number.
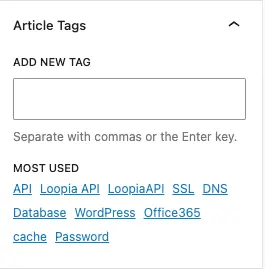
Tags
Just below the categories you will find tags. Tags are small keywords that describe your post and that visitors can use to find other posts on related topics. They are a good complement to categories because they can be much more specific. For example, you might use a tag called “flower” or “red”, but you would probably not have a category by that name.
To add tags, type them into the box, separating each tag with a comma or the Enter key. You can use several tags per post, but try not to go overboard – too many tags do more harm than good.
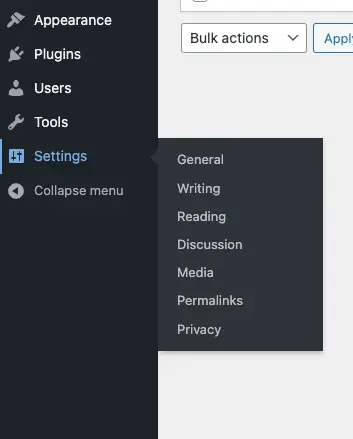
Permalinks
When you read this article, the URL in your browser ends with /wordpress-school-install-wordpress-and-publish-a-post/. That last part is the permalink. The permalink helps Google and your visitors understand what the post is about. Here is how to customise the structure of your permalinks:
- Go to the WordPress admin panel.
- Click Settings → Permalinks in the main menu on the left.
- Tick the permalink type you want to use. We recommend a structure that includes the name of the post.
- Click Save Changes.
3. Publish your post in WordPress

When you are working on or have finished your post, you can save it and then publish it. You do this in the top right corner of the editor.
- Save draft: if you want to continue working on the post later.
- Preview: to see how your post will look before you publish.
- Publish: when you are ready to share your post with the world.
If your post is finished but you want it published at a later time, you can schedule it. You do this under “Summary” at the top of the post’s right column. You can also choose visibility, format and author here. To schedule a post:
- Click the blue text next to “Publish” where it says “Immediately”.
- Enter the date and time when the post should be published.
- The blue button in the top menu should now say “Schedule” instead of “Publish”. Click it to schedule your post.
Congratulations – you have just published your first post!
Do not be afraid to edit, add or remove content in older posts if something is wrong or missing. Have an outside person proofread your posts before publishing them, and use a proofreading tool to avoid careless spelling mistakes.
Above all – write often and regularly, and write about what you love. It is now up to you to capture other people’s interest with your news feed or blog, and tell your friends that you exist!
In the next part of the WordPress school we will look at how to change the theme and modify the appearance of your WordPress site. Until then, good luck!
Read more about the website tool WordPress at Loopia »
Want to read the next part of the WordPress school?
You can quickly and easily jump to one of the other parts here: