This guide walks you through setting up Microsoft 365 manually for your domain when the automatic setup doesn’t complete correctly. You can also use it to connect a domain hosted at Loopia to a Microsoft 365 subscription bought from another provider. The process covers checking your licence, signing in as the admin user, adding and verifying your domain, configuring the required DNS records (MX, CNAME, SRV) and creating email users.
For a general overview of the service, see Get started with Microsoft 365.
1. Check that the service is paid for
Before Microsoft 365 can work you need a valid, paid-up licence. To check, log in to the Loopia Customer Zone and open Invoices at the bottom of the page. Click the Paid tab — you should see an invoice for the Microsoft 365 licence if the payment has gone through.
2. Sign in as the admin user
When Microsoft 365 is activated, an admin user is created automatically. This user has no licence attached and is only used to sign in to the Microsoft 365 portal at login.microsoftonline.com.
To find your admin user, log in to the Loopia Customer Zone and click Microsoft 365 under Services.
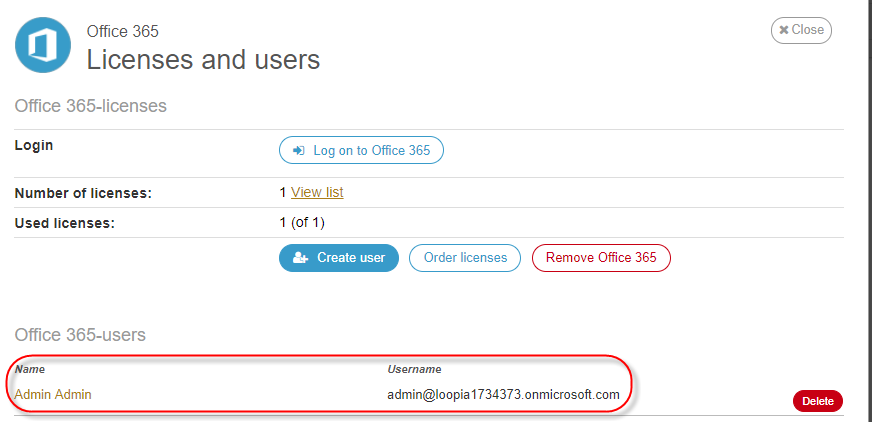
If you’ve forgotten the admin password, click the user in the list, enter a new password and click Save.
You can now sign in to the Microsoft 365 portal at login.microsoftonline.com. Once signed in, the dashboard looks like this:
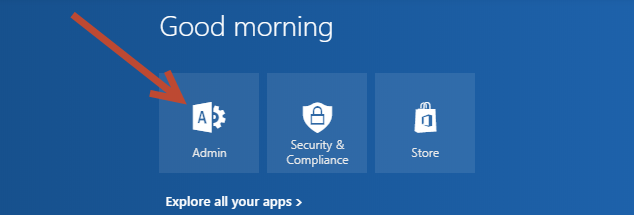
Click Admin to open the admin centre:
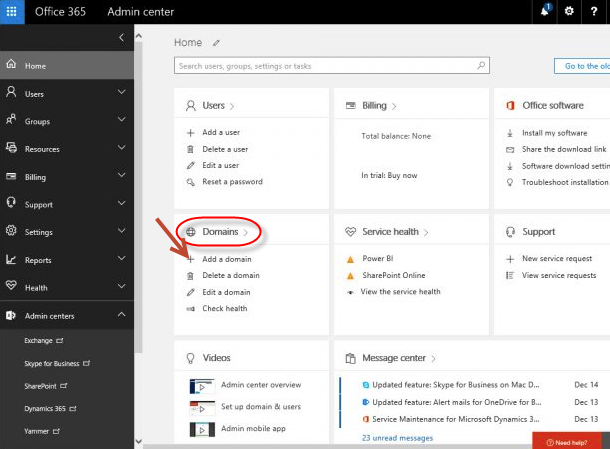
Click Add a domain to continue.
3. Configure your domain
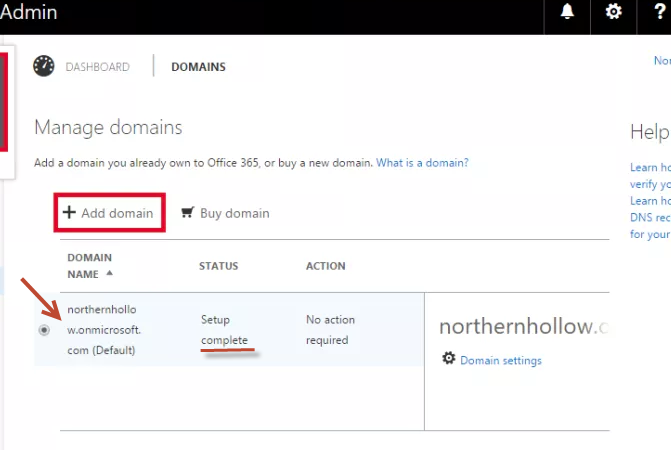
The domains screen shows which domains are connected to the account. Microsoft automatically creates a domain ending in .onmicrosoft.com, which the admin account uses by default (indicated by the arrow in the screenshot below).
A status of Configuration pending means the DNS settings aren’t fully in place yet. Complete means the DNS records have been added.
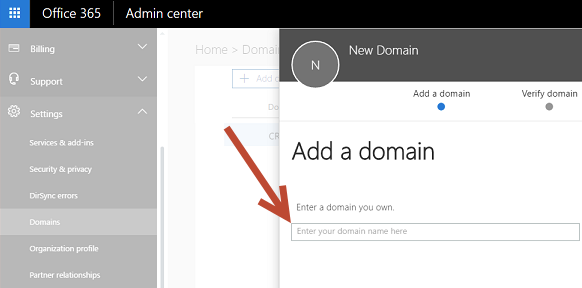
If your own domain is not listed, click Add a domain (highlighted with a red box in the screenshot below).
Add your domain
Enter the domain name you want to connect to Microsoft 365 and double-check the spelling.
Note: we do not recommend using domains that contain special characters such as ø, æ or å.
Click Next.
Verify your domain
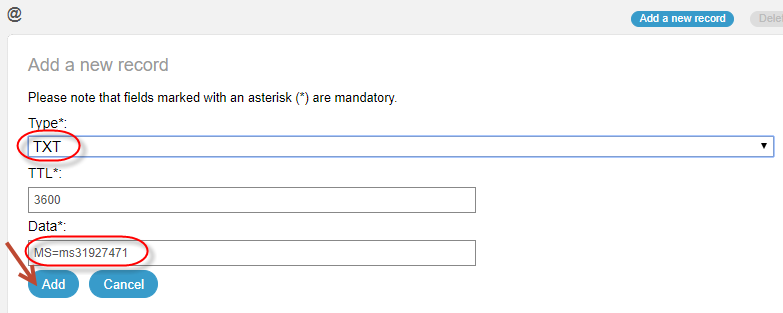
To prove you own the domain, Microsoft asks you to add a TXT record to its DNS. Copy the verification value that begins with MS=msXXXXXXXX.
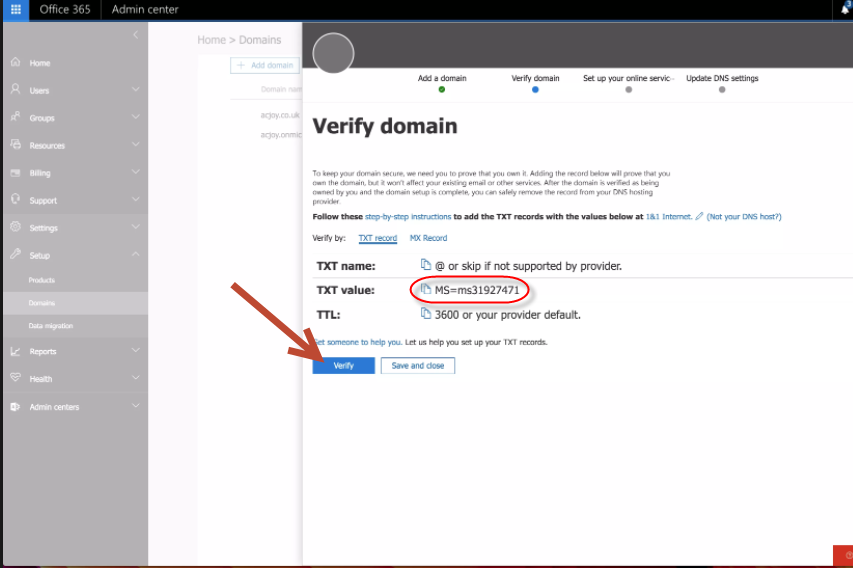
For step-by-step instructions on adding the TXT record at Loopia, see Verify a domain name via DNS.
The TXT record should look like this:
After adding the record, wait around an hour for DNS to propagate, then click Verify in the Microsoft portal.
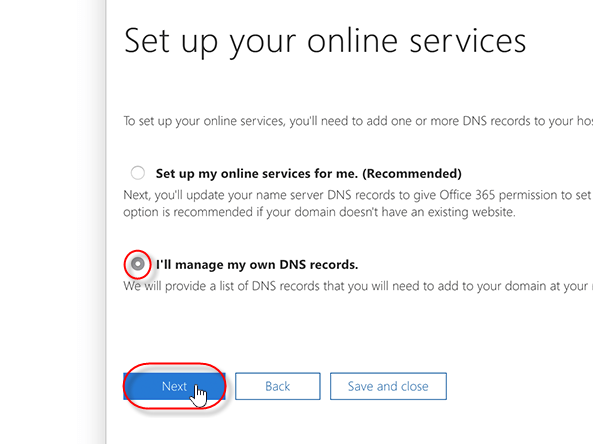
Set up the online services
Once the domain is verified, you need to add the remaining DNS records. Because the DNS is hosted at Loopia, choose I’ll manage my own DNS records and click Next.
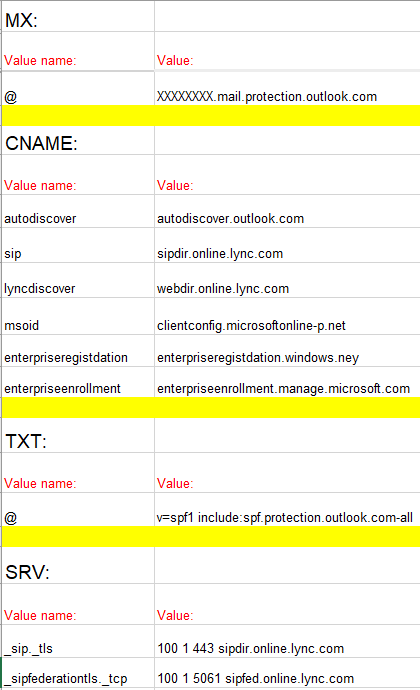
Microsoft now lists the records you need to add. A red Post missing message means that record still needs to be added in the Loopia Customer Zone.
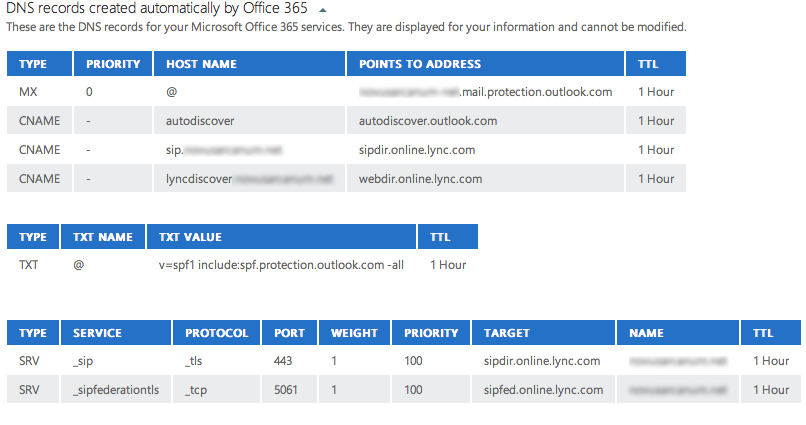
The screenshot below shows the full set of records needed for Microsoft 365 to work. Values shown as XXXX are specific to your domain and must be taken from Microsoft’s record list above (the Host name and Points to address or value columns).
Important: if you already have MX records for the domain, the existing email service will stop working as soon as the new MX records take effect. If your domain is currently in use for email, consider waiting until you are ready to switch before updating the MX records. If you are setting up email for the first time, you can add the new MX records right away.
For help with the individual record types, see our guides on DNS MX, CNAME and SRV records.
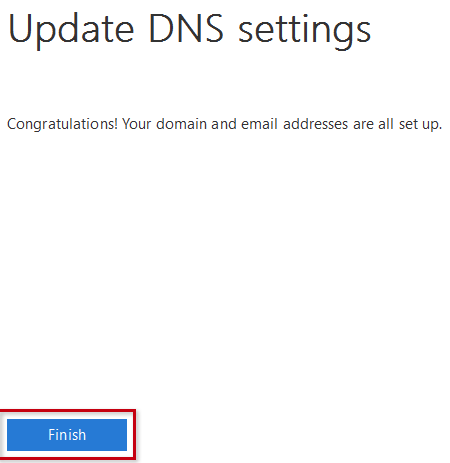
After you add the records, allow up to two hours for them to propagate so Microsoft can verify them. Then sign back in to login.microsoftonline.com and click Finish to complete domain verification.
The domain should now show the status Setup complete.
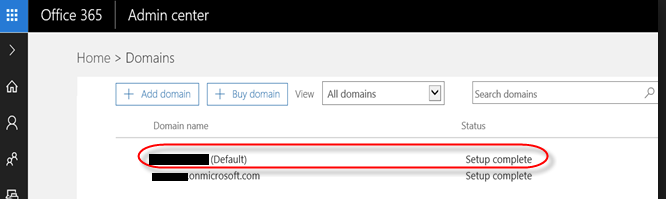
Your domain is now connected to Microsoft 365. You can sign out of the portal and go back to the Loopia Customer Zone.
4. Create an email user for Microsoft 365
If Loopia’s own email service is currently connected to your domain, the option to create a new Microsoft 365 user from the Customer Zone won’t be available — the two email services cannot run on the same domain at the same time. In that case, create the user directly in the Microsoft 365 portal, following Create an email user in the Microsoft 365 portal.
If Loopia email is not connected to the domain, you can create users and assign them Microsoft 365 licences from the Customer Zone:
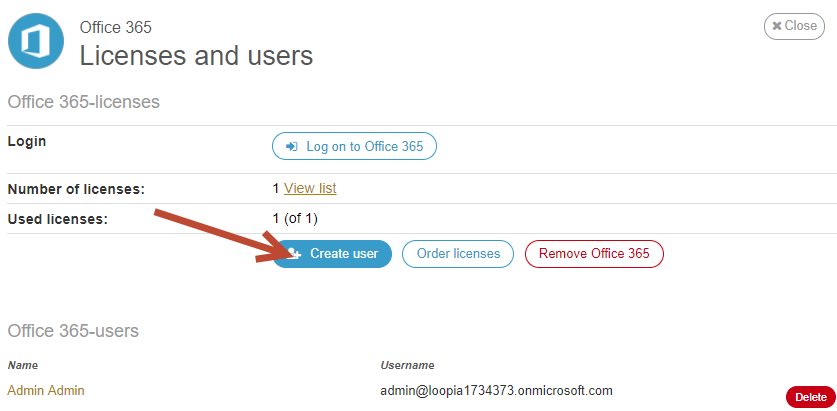
- In the Loopia Customer Zone, click Microsoft 365 under Services.
- Click Create user.
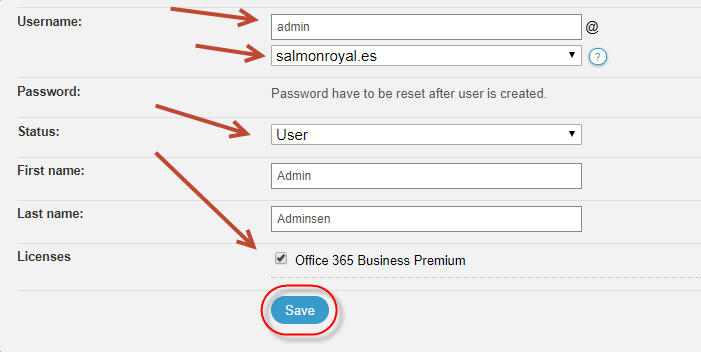
Fill in the values for the new user:
- Domain — the domain the address belongs to (only shown if you have more than one domain connected to Microsoft 365).
- Role — whether the user should be an administrator or a regular user.
- Licence — which Microsoft 365 licence to assign. If no licences are available, click Order licences instead of Create user.
Microsoft 365 is now active on your domain. The user you created can receive email and sign in to the portal at login.microsoftonline.com.
Migrate existing email
If you have email left in old mailboxes at Loopia, you can migrate it to your new Microsoft 365 mailboxes. See Move email from Loopia to Microsoft 365.
For more Microsoft 365 guides, see Administration of your Microsoft 365 account.