Sometimes the settings for Microsoft 365 doesn’t setup correct and therefore we have created a guide to how to setup Microsoft 365 manually for your domain name. You can also use this guide if you have bought Microsoft 365 from another provider then Loopia.
Here you will find more information about Microsoft 365:
Get started with Microsoft 365
1. Is the service paid for?
Before Microsoft 365 can work you will need valid licenses that are paid for. In order to control that you would need to login to your Loopia customer zone. At the button of the website you will find “invoices”. Click then on “paid“. There should be an invoice for the Microsoft 365 license if it has been paid for.
2. Login as Admin
When Microsoft 365 activates then there is automatically generated an admin user. The user has no license connected to it and therefore only works as an account to log on to Microsoft 365’s portal on portal.office365.com.
In order to see your admin user you would need to login to your Loopia customer zone and click on “Microsoft 365” which is under “Services”.
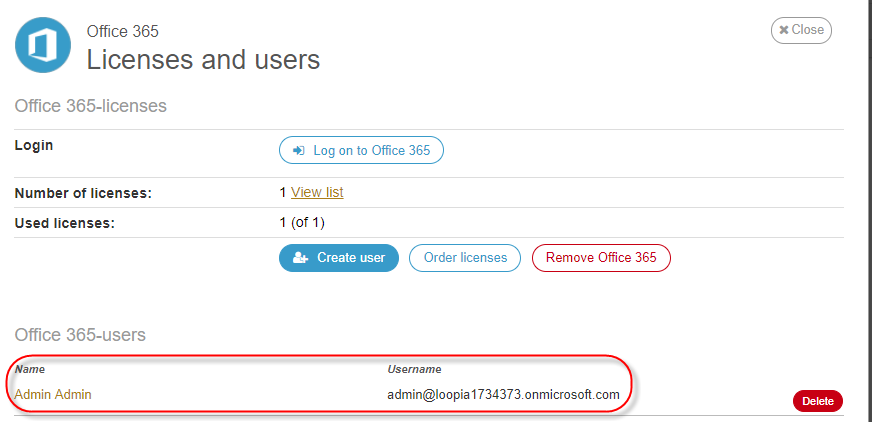
If you can remember the password for your admin user then you can change it by clicking on the user in the list. There you can afterwards write in the new password. Click on “save” afterwards in order for the new changes to be saved and updated.
Now you can use your admin account through the Microsoft 365 portal on: portal.office365.com.
Once you are logged in it looks like this:
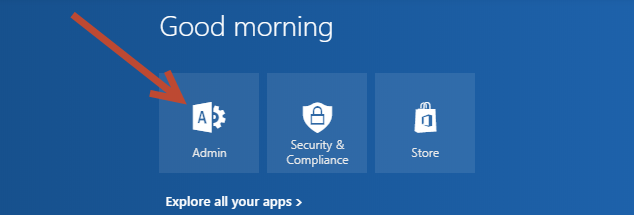
Like shown above click then on “admin” and then you will see this:
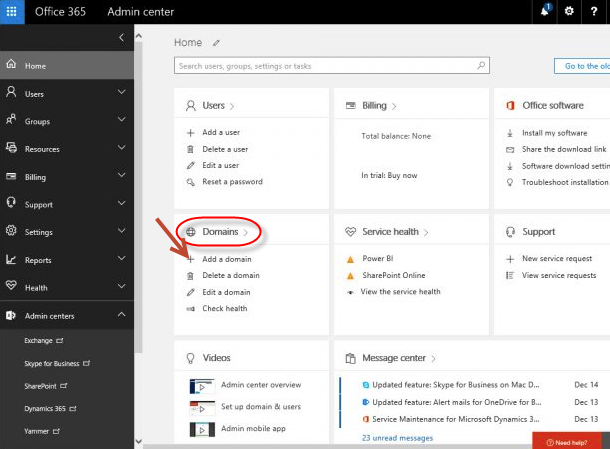
Click on “add a domain” in order to proceed (like shown above).
3. Configure your domain
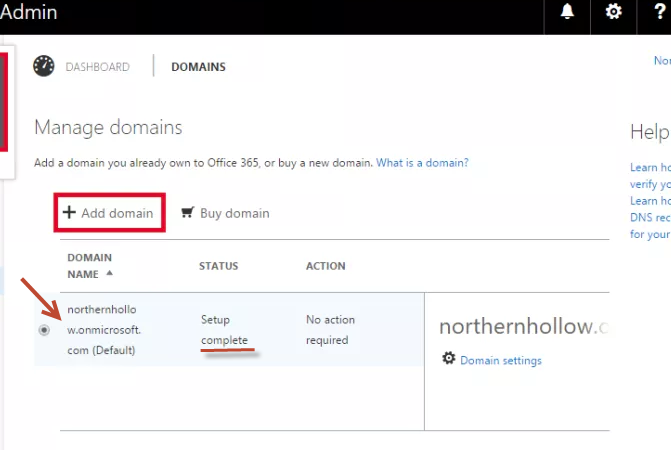
Here you can see which domains have to be connected to the account. Microsoft generates automatically a domain that ends with “.onmicrosoft.com” that is the one that the admin account uses. You can see the address referring to where the arrow is pointing at in the screen shot bellow.
If you see “configuration pending” then that means that all the DNS settings aren’t in place yet. If you see status “complete” then the DNS settings are added to the domain.
If you do not find your domain as an Microsoft 365 that should connect to a user then click on “add a domain” which is marked with a red square around it in the screen shot bellow.
Add your Domain
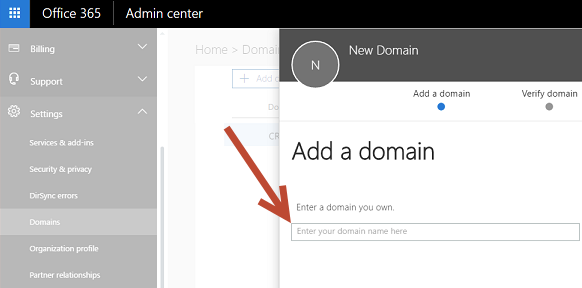
Write in your domain name that you want to connect to Microsoft 365 in the text box. Be cautious that the spelling is correct.
OBS! We do NOT recommend that you use domains that contain special characters like ø æ å).
And click on “next“.
Verify your domain
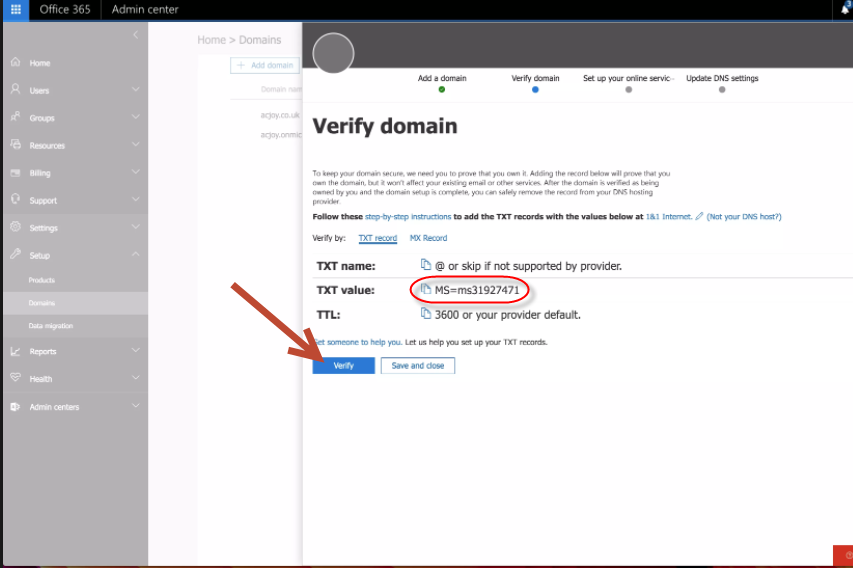
In order to let Microsoft know that the domain has to connect to Microsoft 365 the domain needs to be verified. This is done by adding a TXT record for the domain you want to verify. Copy the test that begins with “MS=msXXXXXXXX“.
Read more about how to add a TXT record to your DNS here:
Verify your domain through your DNS
You TXT record has to look like this:
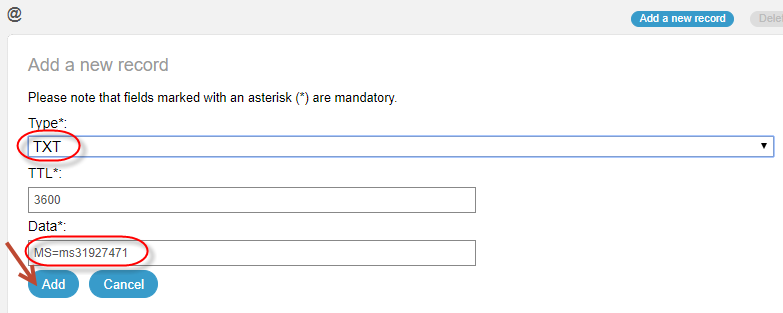
Once the record has been added you will have to wait ca. 1 hour before the record can be visual and then you can click on “verify” like you saw before above.
Set up your online services
If the TXT record was added correctly then your domain should be verified by now.
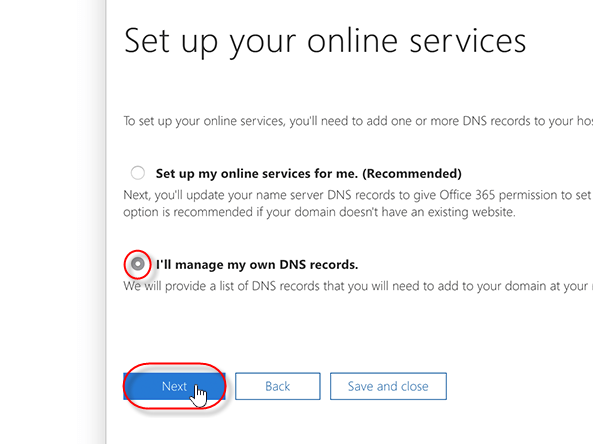
After that is it time to setup the remaining records. Those have to be setup through Loopia DNS server and therefor the alternative would be “I’ll manage my own DNS records” like shown bellow:
Click afterwards on “next“.
Here it shows you the records that you need to set up for the domain. If a red text comes up where the text “post missing” then that means that those records needs to be set up for the domain through the Loopia customer zone.
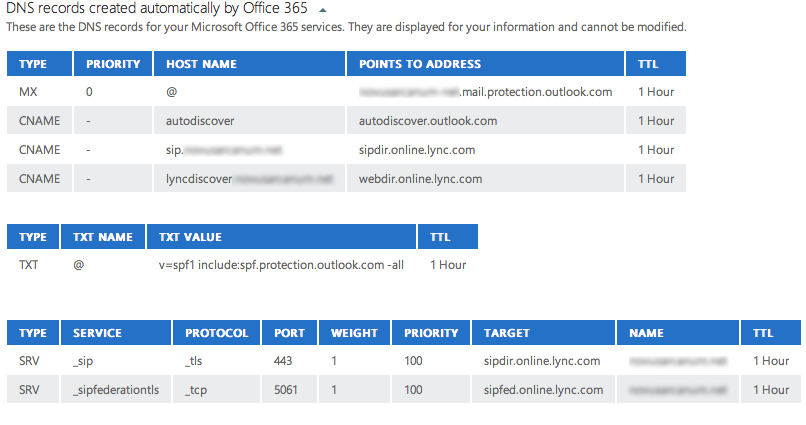
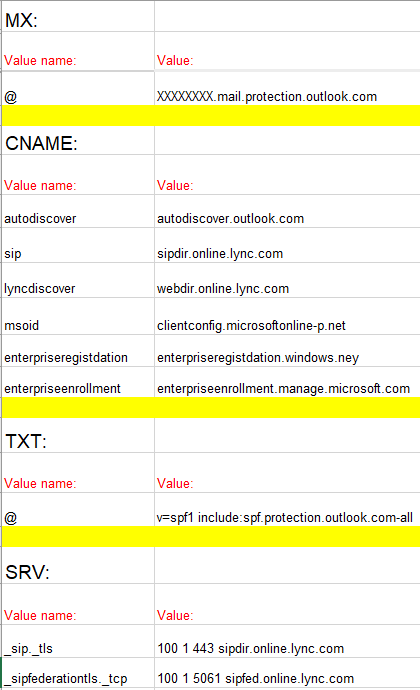
Bellow you will find a composition of all the records that are needed in order for all Microsoft 365 services can work. Those records that are shown with “XXXX” are specified for that domain and so therefor that information has to come from the list from above. You’ll receive the information bellow “host name” and “pointing towards the address or value”.
OBS! If you already have a MX records for the domain then email service that today is connected to the domain stop working. Therefor can it be a good idea to wait with changing or editing until your records or the Microsoft 365 has been updated. If you add a completely new email service then you can add the new MX records already now.
Here is there more information to how you set up those records:
DNS: MX
DNS: CNAME
DNS: SRV
After the records are added then it can take up to 2 hours before they get activated so that Microsoft can verify them. When the 2 hours have passed then you will be able to log in to your Microsoft 365 portal on: portal.office365.com and verify the domain.
Click afterwards on “finish”.
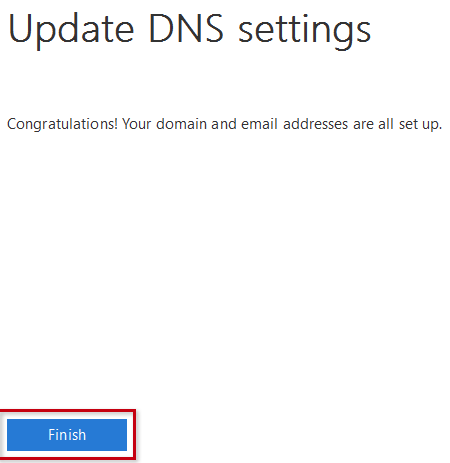
Now the domain should come up with the status “setup complete”.

Now your domain is added and connected to the Microsoft 365 service. You can now log out from your Microsoft 365 portal and log in to your Loopia customer zone.
4. Create a new email user for Microsoft 365
If you already have Loopia’s email service connected to your domain then this option of adding a new user not available. This is due to that both services can’t operate together and will create an obstacle for each other.
Please see the guide bellow in order to create a user in Microsoft 365 portal:
Create an email user i Microsoft 365 portal
If you don’t already have an email service connected to the domain then you would need to create new users and assign them Microsoft 365 licenses. This is done like shown bellow:
Click on “Microsoft 365” under “Services” in your Loopia Customer zone.
Click afterwards on “Create user”.
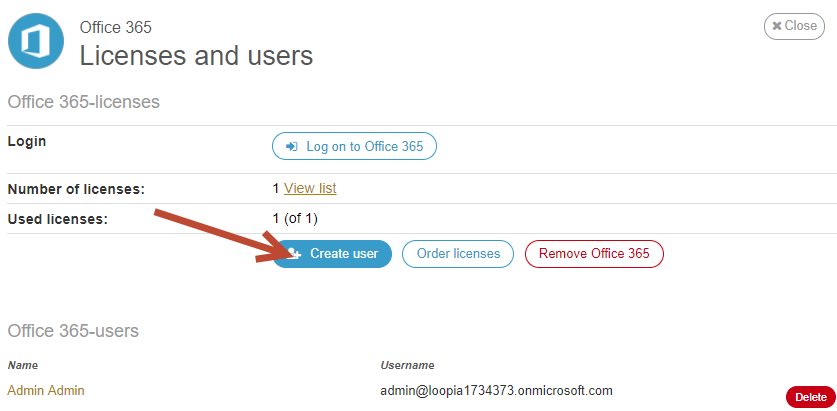
Fill out the the values the the email user to be created. First you chose the domain that the email is going to be created for. This is only applicable if you have more than 1 domain name connected to Microsoft 365.
Next you choose what title the user should have. If the user should be administrator or only have usual user rights.
Next up you will have to choose which type of license the user should have. If you do not have any licenses available click on “order licenses” instead of “create user”.
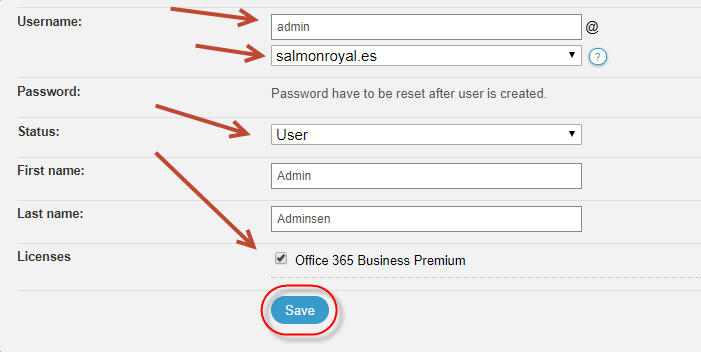
Now the Microsoft 365 service has been activated and connected to the domain. The user we have created can now receive emails and log in to the portal through portal.office365.com.
Migrating of old emails:
If you have old email accounts where there still are emails left then you can migrate those to your new Microsoft 365 email accounts:
Move email from Loopia over to Microsoft 365
Here you will find more guides for Microsoft 365: