Loopia Webmail makes it easy and convenient for you to check and send emails through a web browser. All you need to use the program is a computer with an internet connection.
You can find the webmail at the following address:
The advantages of Loopia Webmail are:
- Easily accessible in the browser.
- It allows you to use your email anywhere and anytime on computer, tablet and phone.
- You can create folders and mailing lists through our interface.
In this guide, we explain how to do various things in the Webmail.
Let’s get started!
- Changing your email password
- Logging in to the Webmail
- Inbox
- Personalized settings
- Managing folders
- Sending email
- Managing e-mail messages
- Signature
- HTML signature
- Create a contact group / mailing list
- Delete messages in webmail
- Fetching email headers
- Save address from message in webmail
- Dark mode
- Switching to the old layout
Changing your email password
If you need to change your email account password you can do so in two ways:
If you know your current password, log in with your email address & password in the mailadmin interface here.
If you do not know your current password, log in to your Loopia customer zone, click on the email address and choose to enter a new password for the email address.
You can reach the Loopia customer zone here.
Logging in to the Webmail
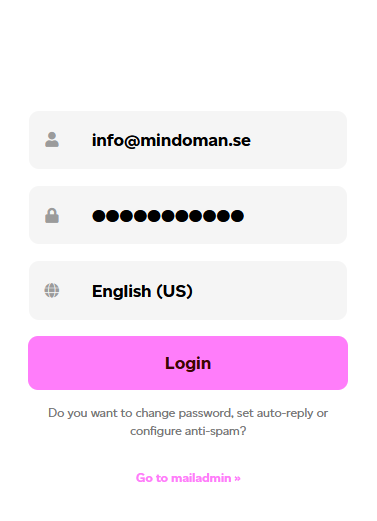
Enter your full email address as per our example in the “Email address” box and your password in the “Password” box below.
Then click on “Login”.
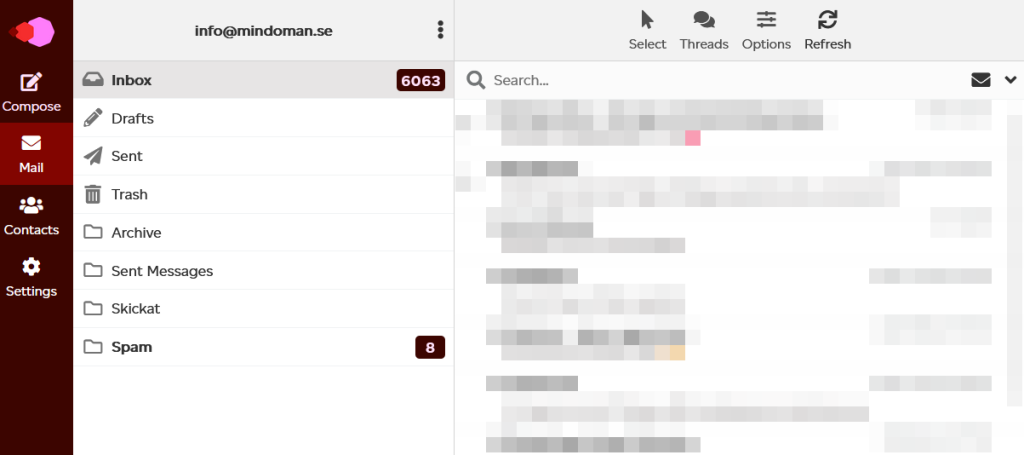
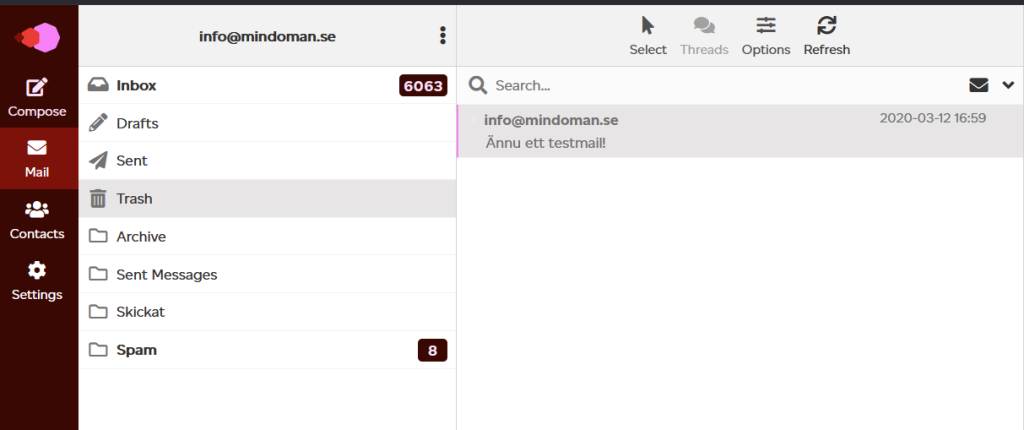
Inbox
Once you’ve logged in, you’ll be taken to your inbox, where you’ll see your folders, emails and links to all the features of Webmail.
You can quickly and easily sort your emails based on subject, sender, date and size. You can also move messages between folders, delete, reply to or forward them.
Personalized settings
To make your webmail more personalized, you can change some settings in it by clicking on “Settings” in the menu on the left.
You will then see a few different categories with settings that can be changed.

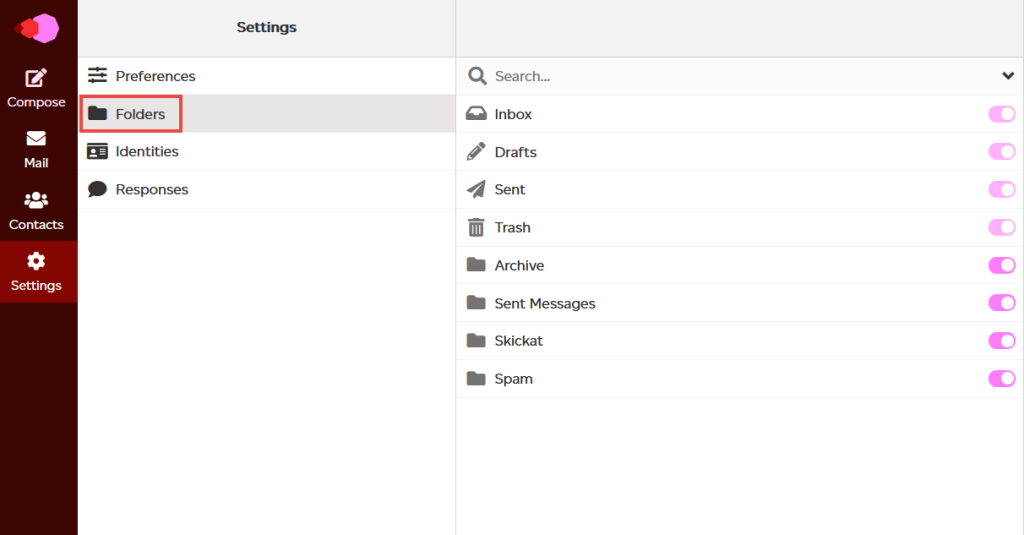
Managing folders
You can manage the folders that exist by clicking on “Settings” in the menu and then on “Folders”. There you can then create folders, delete folders and change certain settings for them.
To rename folders and adjust display options, click on the folder name in this view.
Sending email
Sending messages is easy in the webmail.
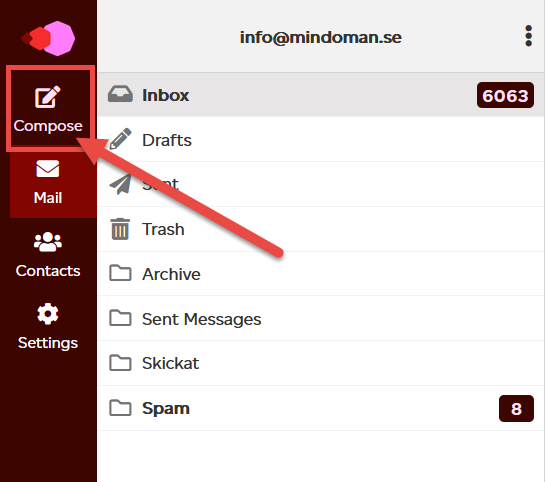
Click on the “Compose” menu item in the left column to start composing your email message.
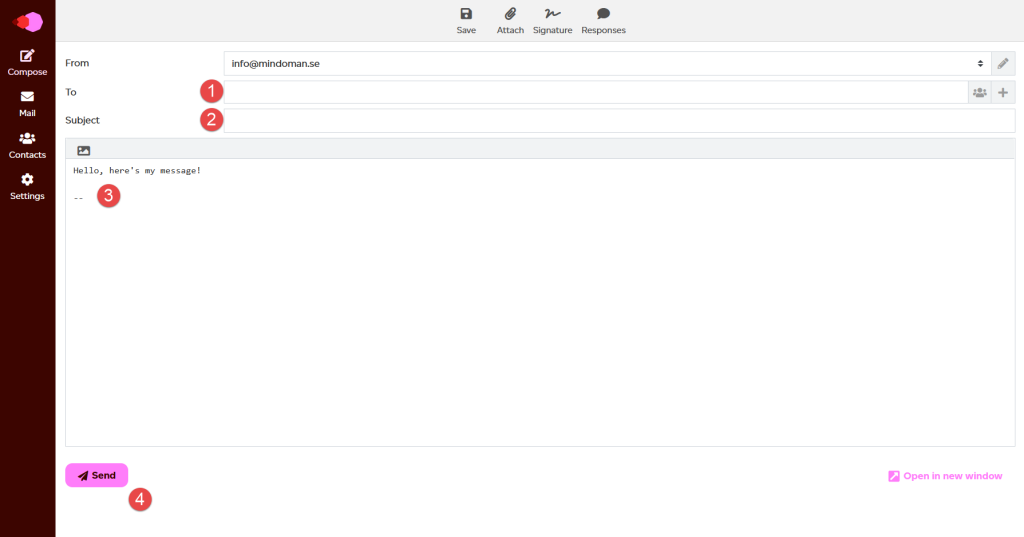
You can set who the message should be sent to in the “To” field and enter a “Subject” that will appear to the recipient as a header for your message.
If you want to add an attachment, click on the “Attach” button in the top menu.
When you are done writing the message, click on “Send” at the bottom left under the large message box.
Managing e-mail messages
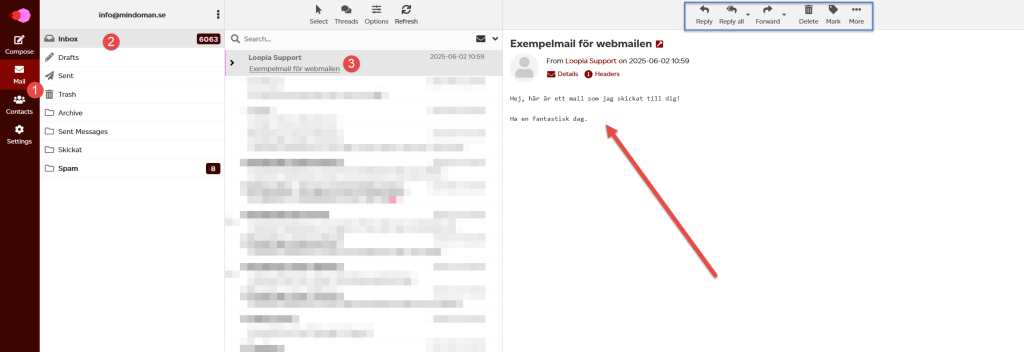
You can see all your messages in the message view that appears immediately when you log in to webmail, or by clicking on “Messages” in the left-hand menu.
Click on a message to read it.
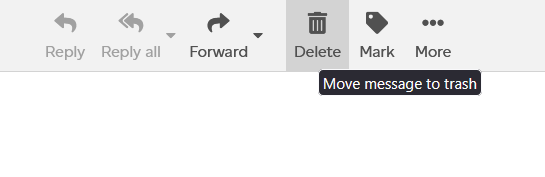
To reply, forward or delete a message, you can use the menu bar above the message.
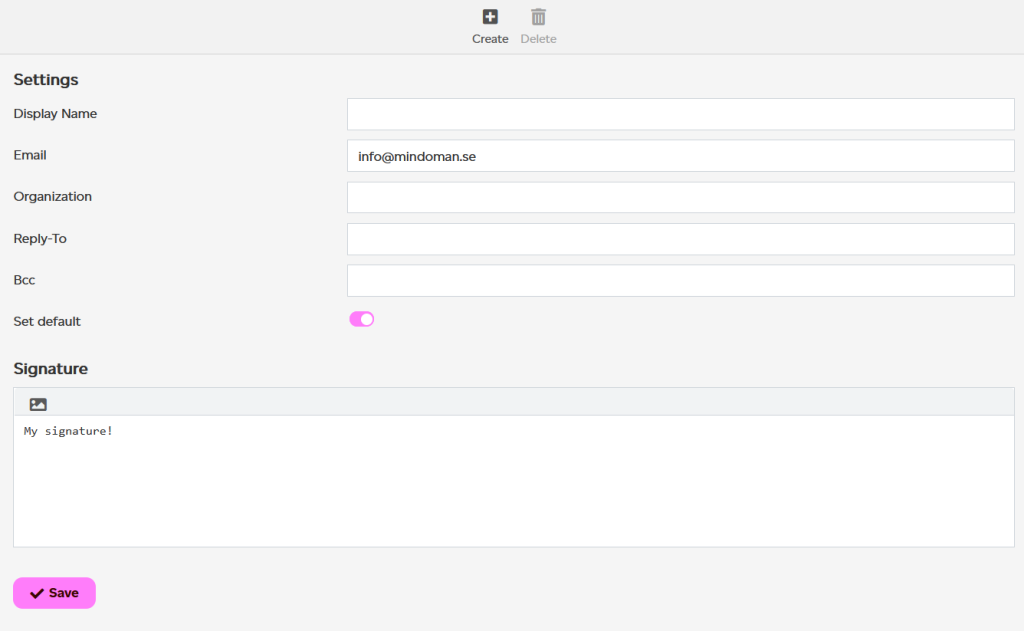
Signature
To create or edit a signature, go to “Settings” in the left menu and then click on “Identities”.
Then select the identity you want to edit (by default there is only one, but you can create a new one by pressing Create at the top right).
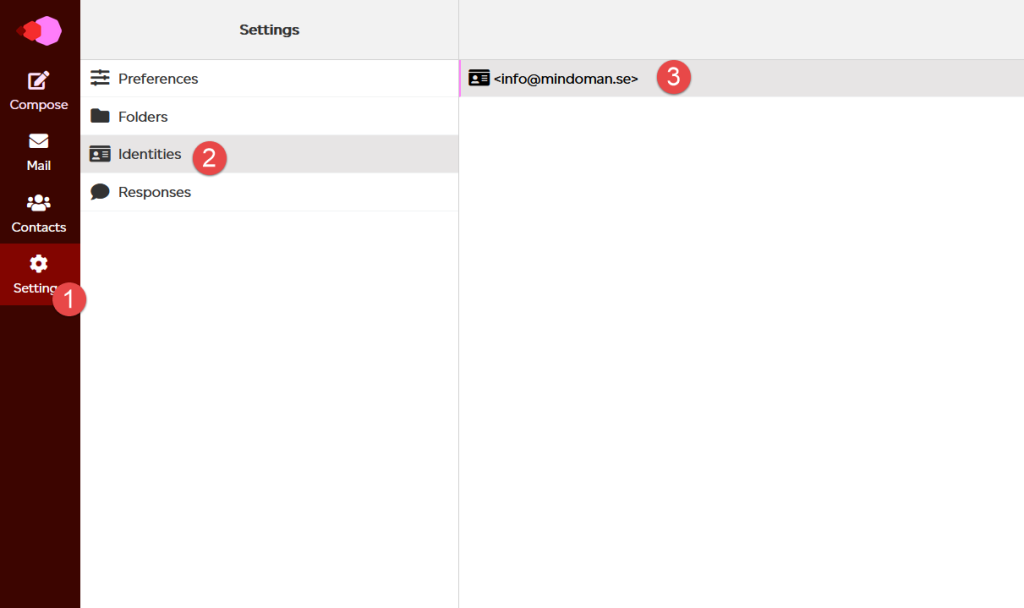
There you can edit both your signature and other related settings.
To save the settings, click on Save.
HTML signature
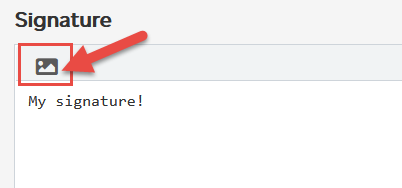
For example, if you want to include your company logo or other image in your signature when you send a message, you can follow the steps below:
Click on Settings in the left column and then on “Identities”.
Select your identity in the left column and click on the small picture icon above the signature.
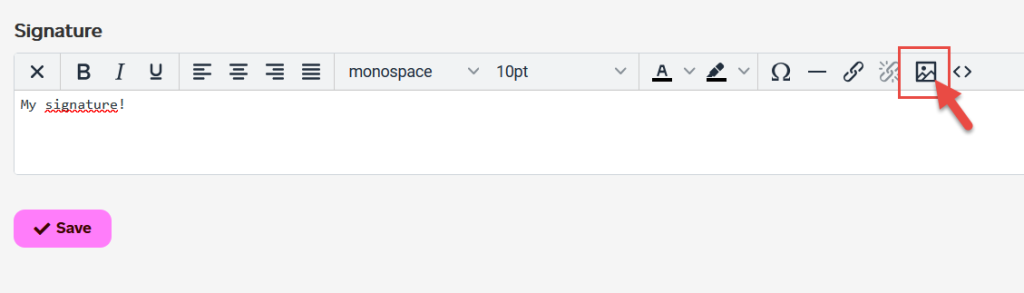
Then click on the image icon in the toolbar above the signature to upload an image to be inserted in your signature.
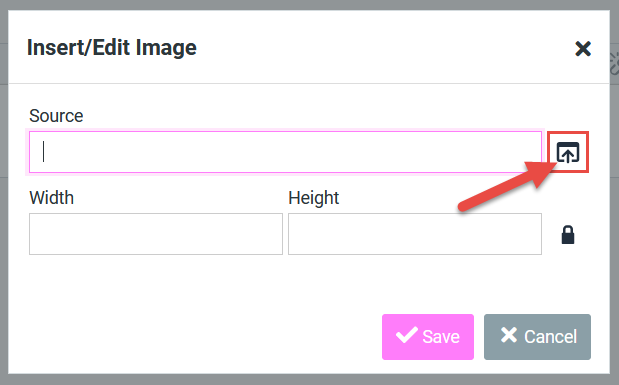
You can either link externally to an image found somewhere on the web, or click on the upload icon to upload an image you have on your computer.
Then click on “Save” to save your new signature.
In order for your signature to appear in messages that you write, you need to go to “Settings” and “Editing messages”.
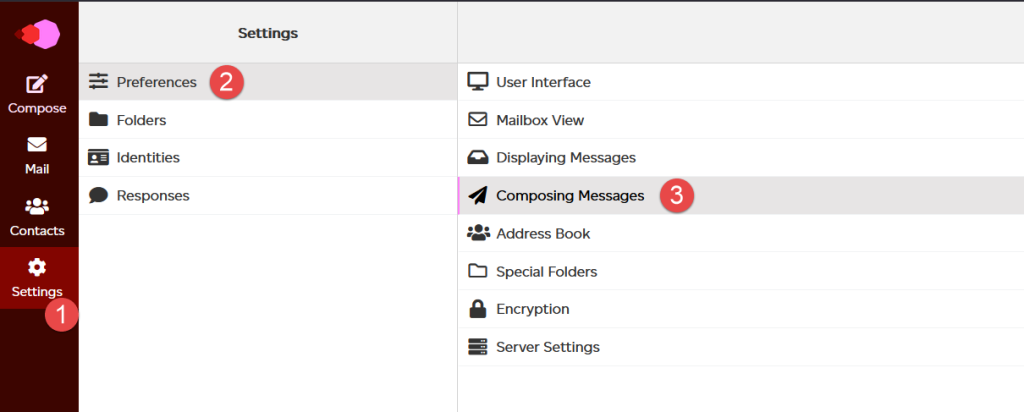
Once there, you should then set “Write messages in HTML format” to ‘Always’ and “Insert signature automatically” to “Always”:
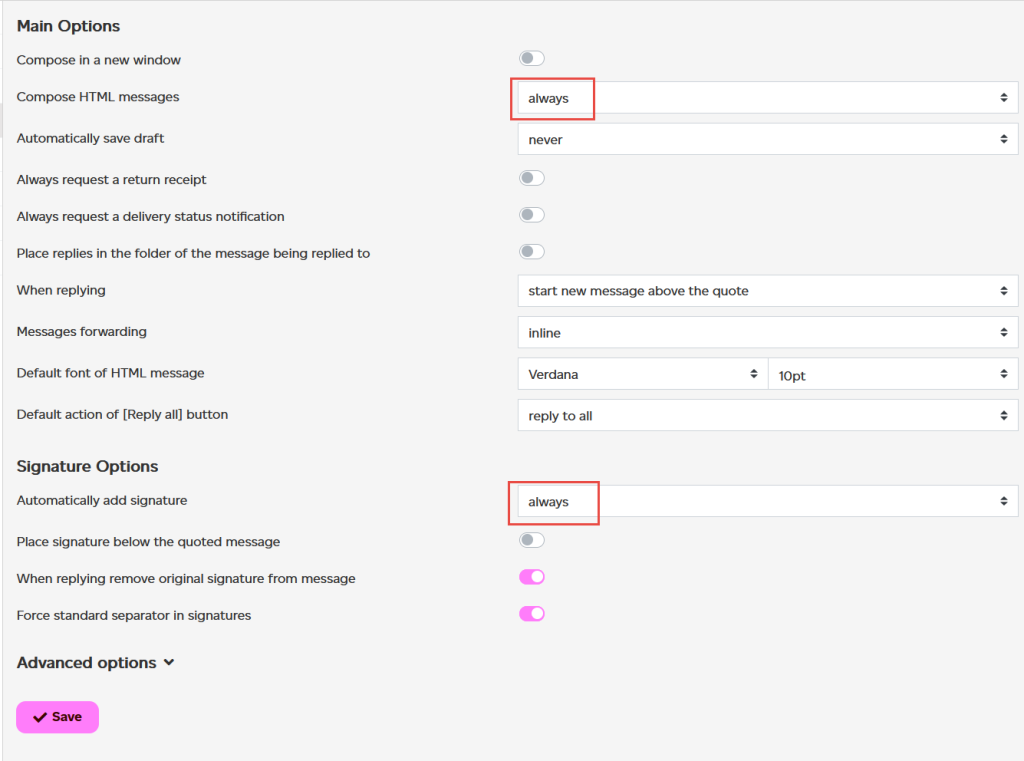
Then click on Save. The next time you write a message in the webmail, your signature will appear automatically.
Create a contact group / mailing list
You can create a contact group or contact list directly in Webmail.
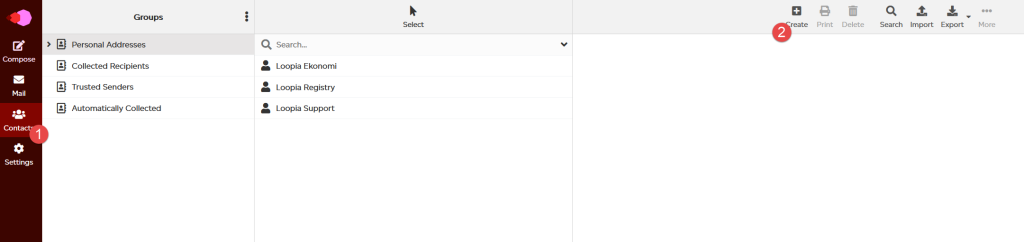
Before you set up a new contact group, you can start by adding the e-mail addresses to be used by selecting “Contacts” in the menu on the left.
Then click on the icon to create a new contact in the upper right part of the page.
Do this repeatedly to add all email addresses to the address book.
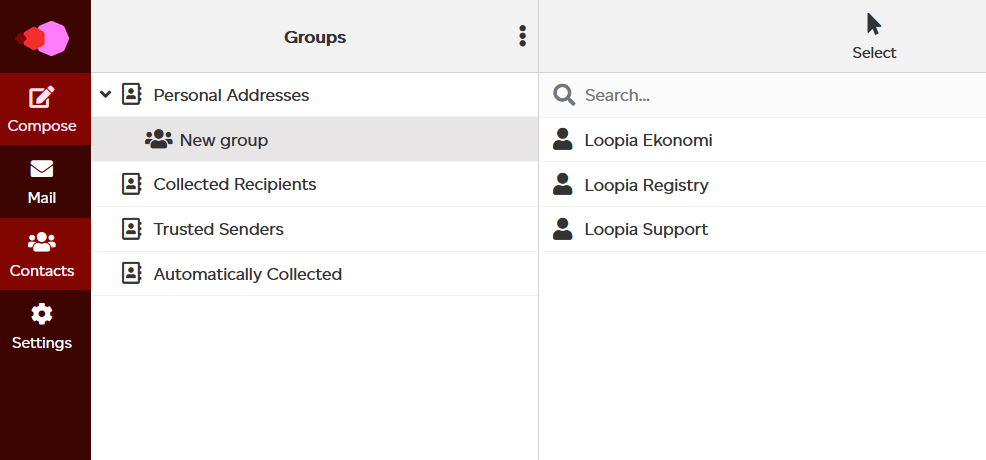
To then add these addresses to groups, click on the bulleted menu at the top right of the “Contact groups” heading. Then click on “Add group”.
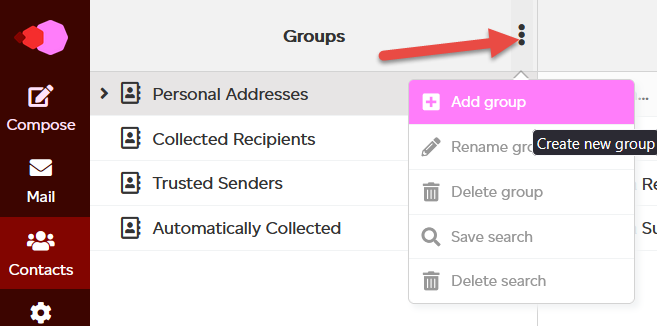
Then enter a suitable name for your first group and click Save.
Click on your first address list which is usually called “Personal Addresses” or the address list you want to retrieve email addresses from.
Then select the email addresses you want to include in the group and drag them to your group.
A message that the email addresses have been added to your mailing list should now appear in your webmail.

You should now see these addresses when you click on your group.
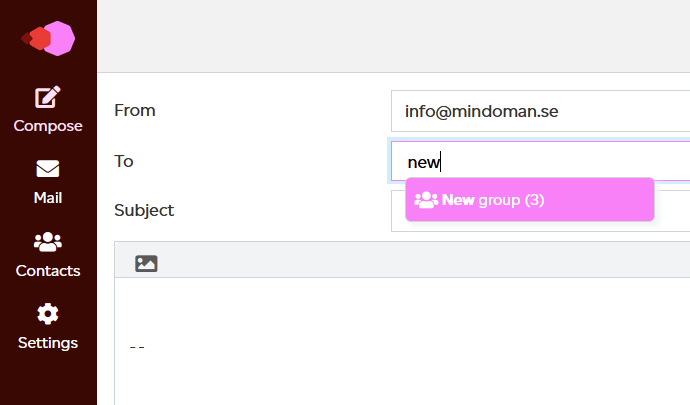
Now you can immediately start sending out messages to your new group.
Open up a new message and type in the first few letters of your group name.
A suggestion of the group will then appear and the number of email addresses in the group will be shown in brackets.
Click on the group name and all addresses in the group will be added as recipients in the recipient address field.
Delete messages in webmail
There are several ways to clean up and delete old messages from your email account.
You can clear your email in our webmail by doing the following:
Select the messages you want to delete in the list of messages.
To select more messages, hold down the Ctrl key on your keyboard while clicking on the messages you want to delete.
You can then click on the “Delete” button at the top right.
You can also hold the mouse pointer and drag them to the trash can in the left column of your webmail.
Your messages are now moved to the trash but are still not deleted from the server.
To delete these permanently, you need to click on Trash in your folder list in the left column.
Select all messages and delete them by clicking the “Delete” button in the toolbar at the top right.
Now these messages are deleted from the server.
If you have accidentally put an email in the trash, you can drag it back to the Inbox by clicking on it and dragging it to the Inbox in your folder list in the left column.
Should it be the case that you have deleted a message completely from the trash, there is no danger as you can contact our support department and ask us to restore your inbox, we can do this three weeks back in time.
Fetching email headers
- Open the message in question.
- Click on the “More” button in the toolbar.
- Click on “Show source”.
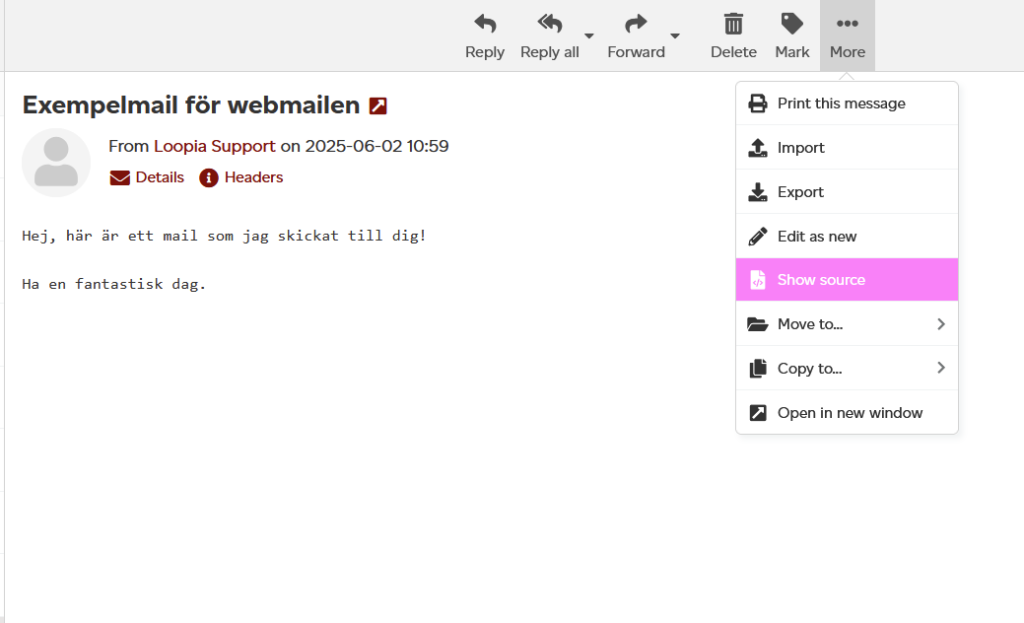
- Select all the text that appears on the screen.
- Right-click and select “Copy”.
- Save to a text file.
- Send to us by e-mail if you want us to troubleshoot the message.
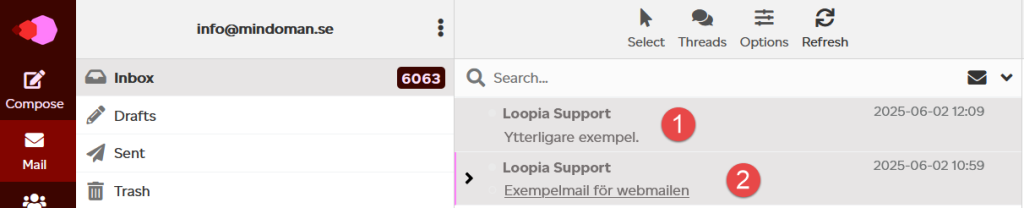
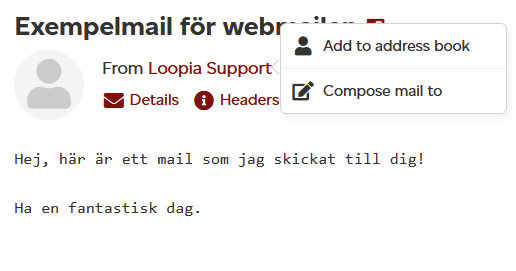
Save address from message in webmail
In the webmail you can quickly and easily add new addresses from your inbox.
Select the message sent from an e-mail address you want to save.
Then click on the sender’s e-mail address. The text “Add to address book” and “New message to” will then appear and you can click there directly to save the address or send a new email to the sender.
A green confirmation box should now appear in your webmail.
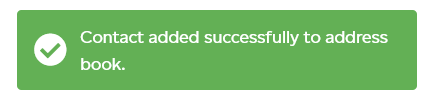
You can then edit the new contact and add name, phone number, etc. by clicking on “Contacts” in the left column of the webmail.
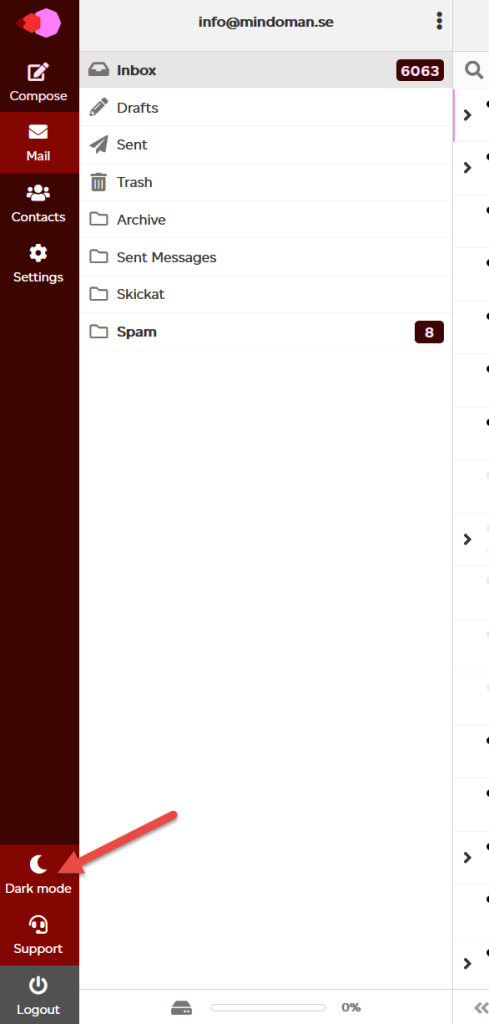
Dark mode
If you want to change the webmail to have a darker interface, click at the bottom left and select “Dark mode”.
To switch back to light mode, just click on the “Light mode” button in the same place.

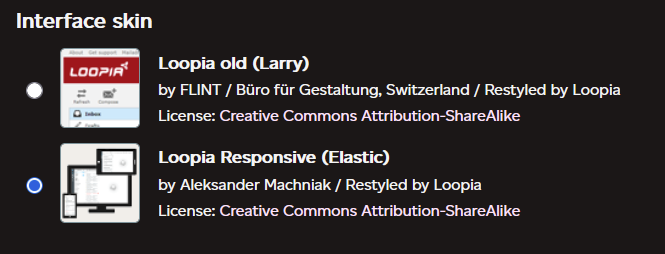
Switching to the old layout
Under the menu item “Settings” and “User interface” you can choose between the responsive theme of the webmail and the previous theme.
These two themes have no functional differences except that the responsive theme works better on different devices.