An alias (additional email address) in Microsoft 365 lets a user receive email at more than one address while keeping a single mailbox. This guide walks you through adding an alias to an existing user from the Microsoft 365 admin centre.
Open the Microsoft 365 admin centre
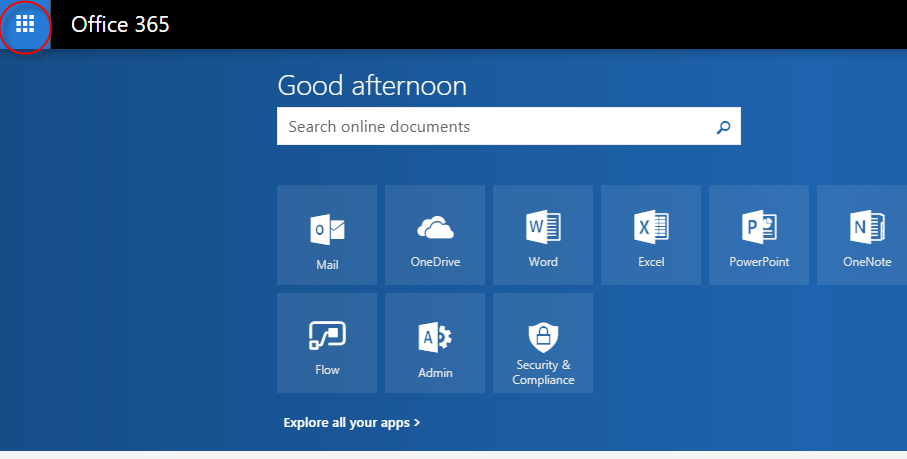
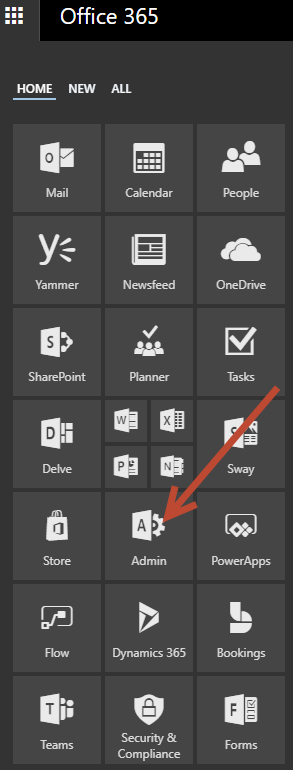
Sign in to login.microsoftonline.com with an account that has administrator permissions. Click the app launcher (the menu box in the top-left corner) and choose Admin to open the Microsoft 365 admin centre.
Open the user you want to add the alias to
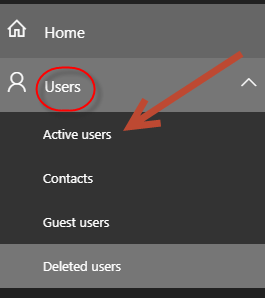
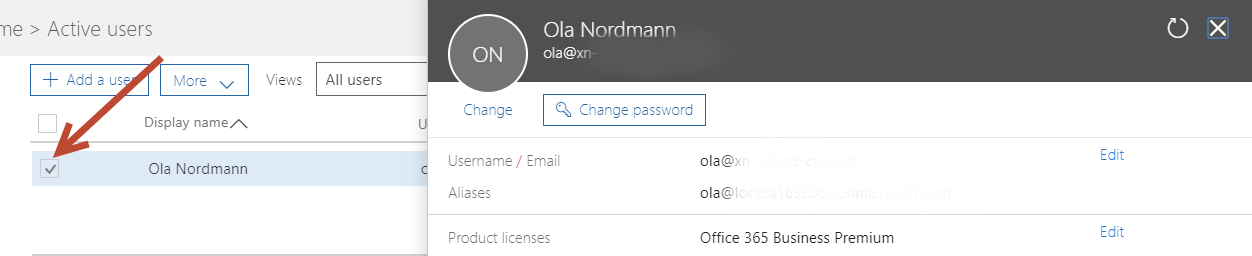
In the admin centre, expand Users in the left-hand menu and choose Active users to see a list of all users on your tenant.
The list of active users appears in the main panel.

Click the user you want to add an alias to. A side panel with the user’s details opens on the right.
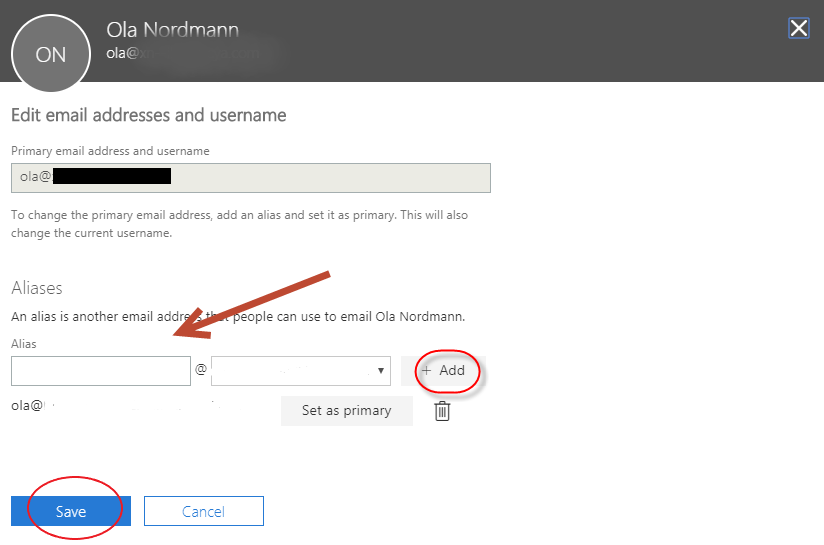
Add the alias
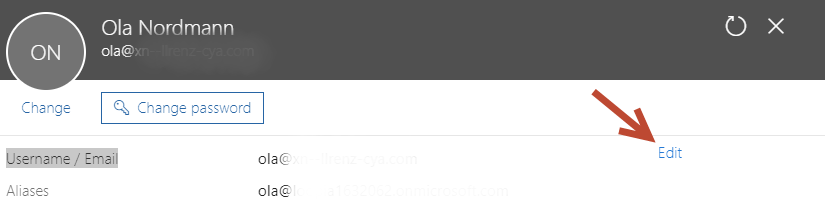
In the side panel, find Username / Email & aliases and click Edit.
Enter the new alias email address under Aliases, click Add and then Save. The alias is now active and the user will receive email sent to either address in the same mailbox.