This article collects setup guides for Microsoft Outlook on Windows, showing how to add a Loopia email address (created in the Loopia customer zone) using IMAP or POP3 and SMTP. The guides below cover the latest version of Outlook as well as the older Outlook 2013, 2010, 2007 and 2003 releases.
New Outlook
Older Outlook versions
Use the links below to jump to the section that matches your Outlook version.
- Outlook 2013
- Outlook 2010
- Outlook 2007
- Outlook 2003
Loopia mail server settings (quick reference)
- Incoming server (IMAP/POP3) and outgoing server (SMTP): mailcluster.loopia.se
- IMAP port: 993 (SSL/TLS) or 143 (STARTTLS)
- POP3 port: 995 (SSL/TLS) or 110 (STARTTLS)
- SMTP port: 465 (SSL/TLS) or 587 (STARTTLS)
- Username: your full email address (for example, name@example.com)
- Authentication: Password
Outlook 2013
Create a new account in Outlook 2013
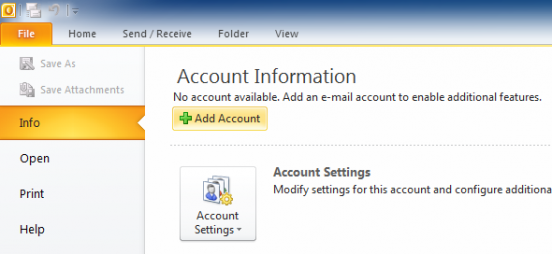
If you’re starting Outlook 2013 for the first time, the Add New Account wizard opens automatically. Otherwise, open File > Info and click Add Account.

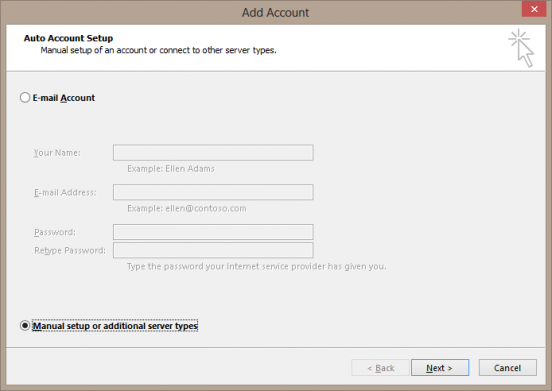
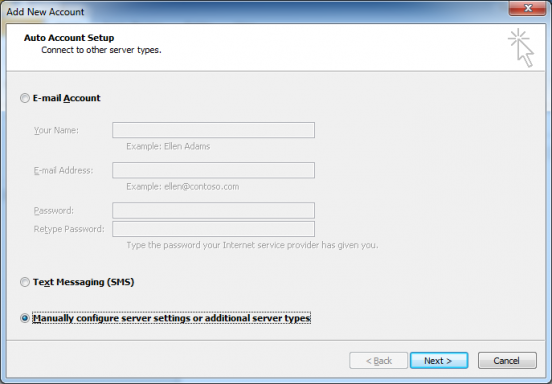
In the first window, tick Manual setup or additional server types and click Next.
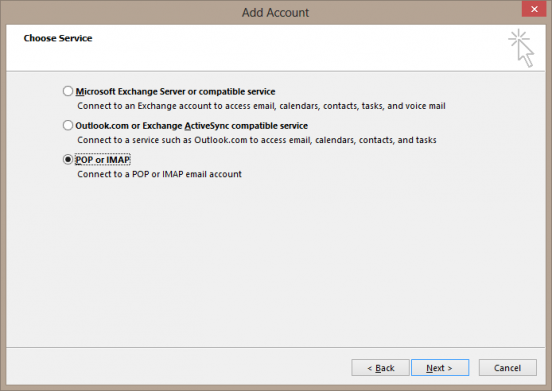
Select POP or IMAP and click Next.
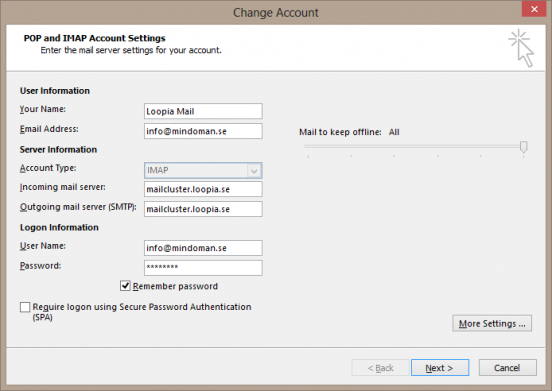
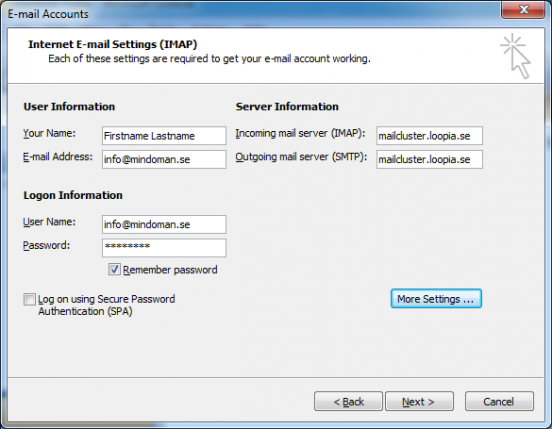
Fill in your account details as shown below, replacing info@example.com with your own email address. The incoming and outgoing servers are both mailcluster.loopia.se. To use POP3 instead of IMAP, change Account Type.
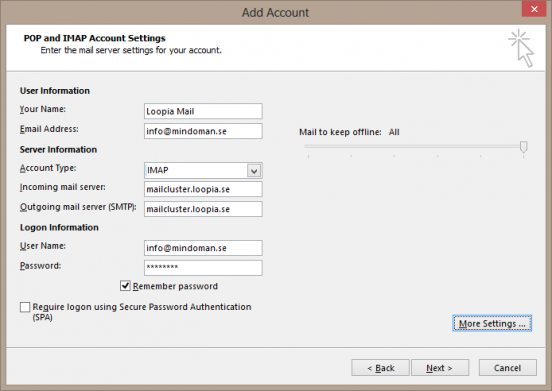
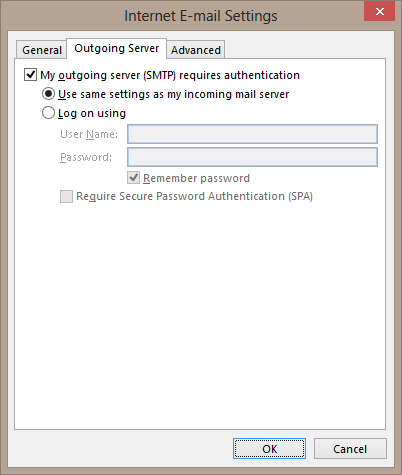
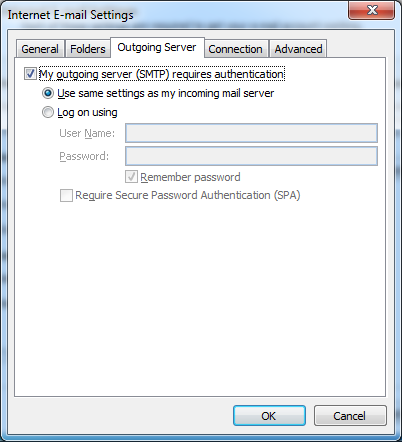
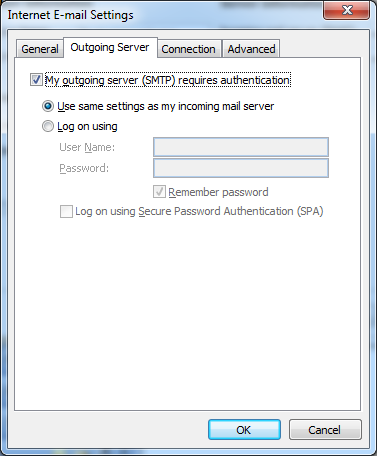
Before clicking Next, click More Settings… and open the Outgoing Server tab. Tick My outgoing server (SMTP) requires authentication and check that Use same settings as my incoming mail server is selected.
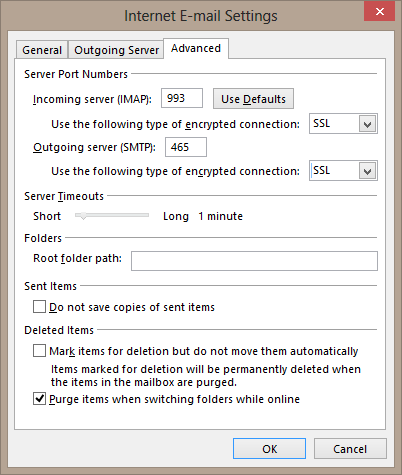
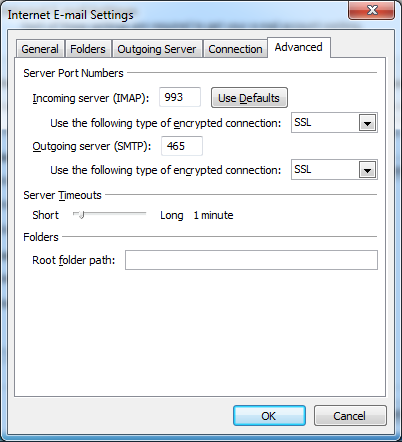
Open the Advanced tab. We recommend enabling SSL/TLS for both servers. If you use SSL, set the Outgoing server (SMTP) port to 465; otherwise use 587. Click OK, then Next in the previous window.
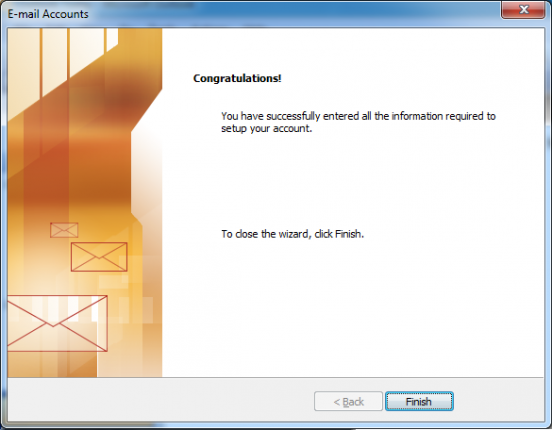
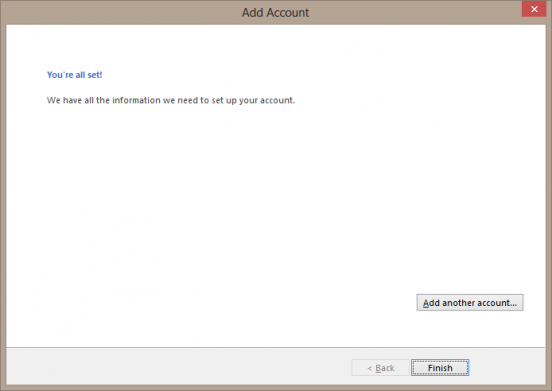
Outlook will test the settings. When it finishes, click Finish to complete the setup.
Edit an existing account in Outlook 2013
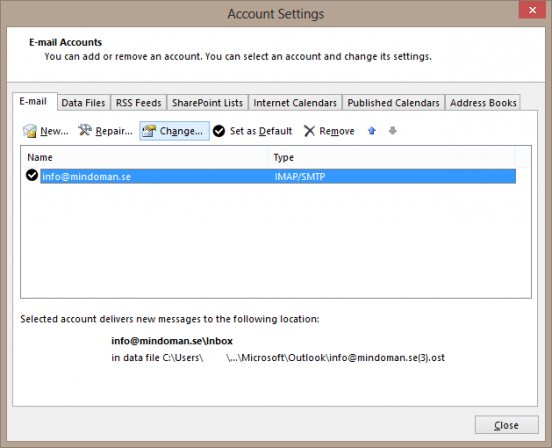
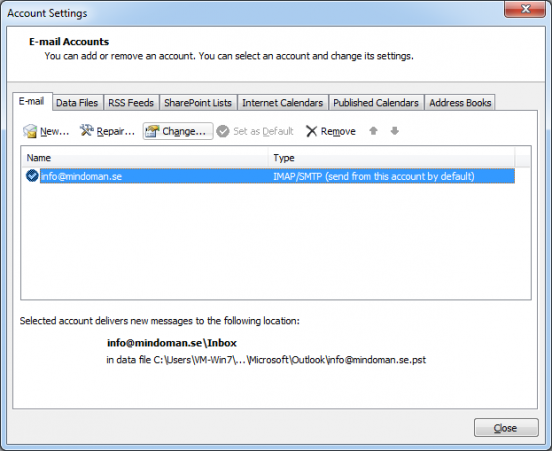
Open File > Info, click Account Settings, then choose Account Settings… from the drop-down.

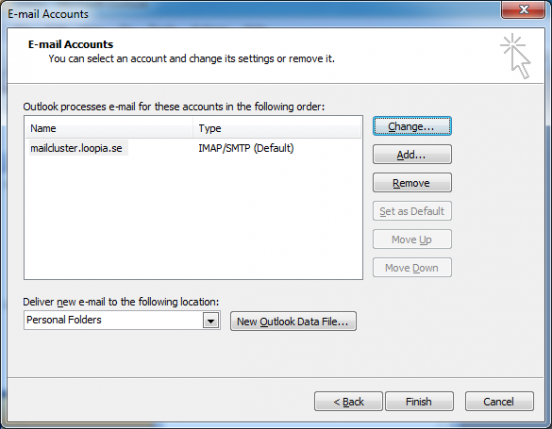
Select your email account in the list and click Change above it.
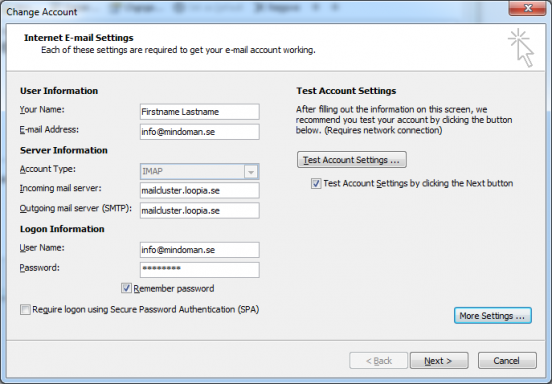
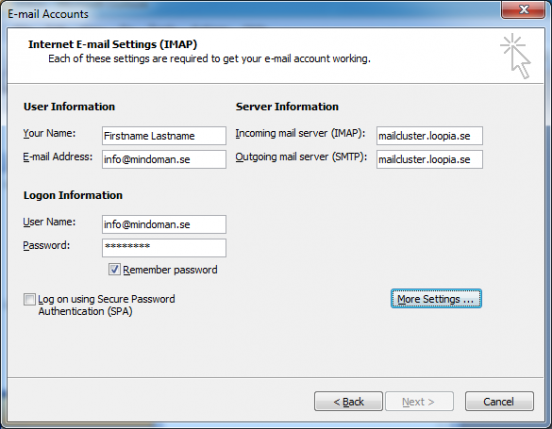
Check that the details below are correct, replacing info@example.com with your email address. Incoming and outgoing servers should both be mailcluster.loopia.se.
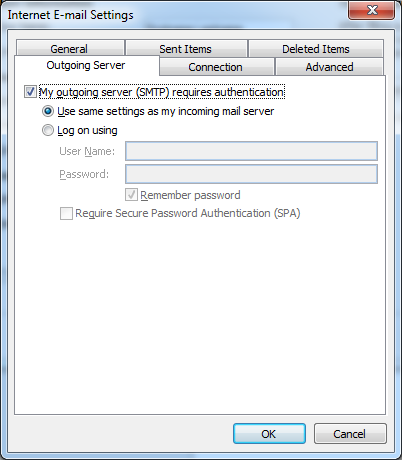
Click More Settings… and open the Outgoing Server tab. Make sure My outgoing server (SMTP) requires authentication is ticked and Use same settings as my incoming mail server is selected.
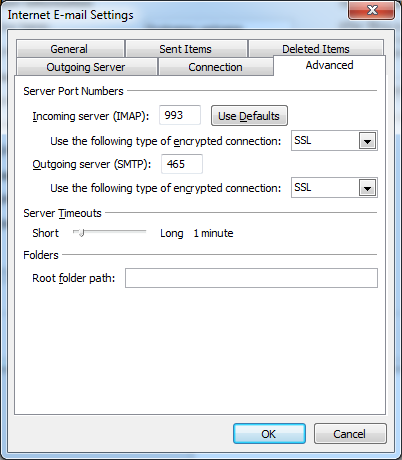
Open the Advanced tab. We recommend enabling SSL/TLS for both servers. If you use SSL, set the Outgoing server (SMTP) port to 465; otherwise use 587. Click OK, then Next.
Click Finish to save your changes.
Outlook 2010
Create a new account in Outlook 2010
If you’re starting Outlook 2010 for the first time, the Add New Account wizard opens automatically. Otherwise, open File > Info and click Add Account.
Tick Manually configure server settings or additional server types and click Next.
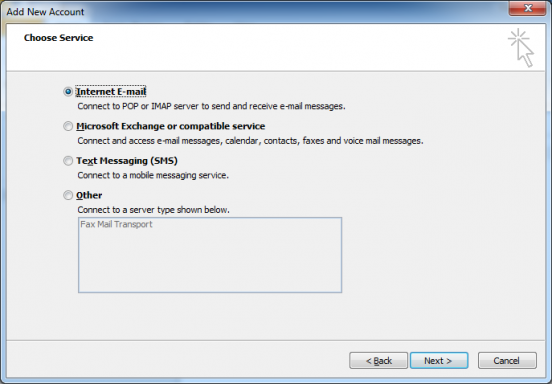
Select Internet E-mail and click Next.
Fill in the account details below, replacing info@example.com with your email address. Incoming and outgoing servers are both mailcluster.loopia.se. To use POP3 instead of IMAP, change Account Type.
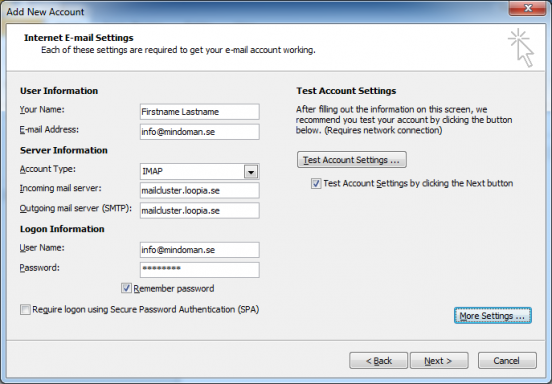
Click More Settings… and open the Outgoing Server tab. Tick My outgoing server (SMTP) requires authentication and check that Use same settings as my incoming mail server is selected.

Open the Advanced tab. We recommend enabling SSL/TLS for both servers. If you use SSL, set the Outgoing server (SMTP) port to 465; otherwise use 587. Click OK, then Next.

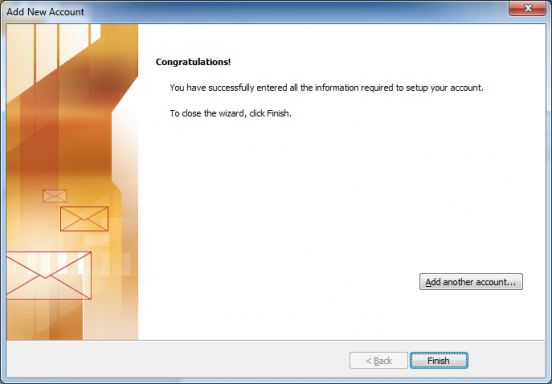
Click Finish.
Edit an existing account in Outlook 2010
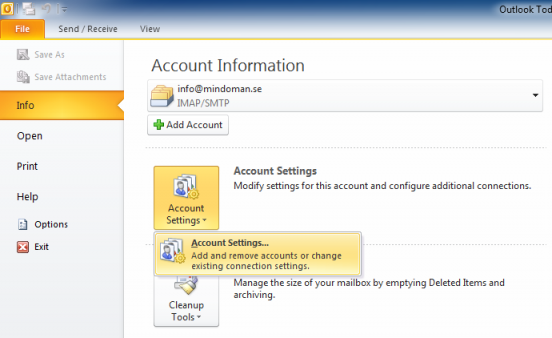
Open File > Info, click Account Settings, and then Account Settings….
Select your email account in the list and click Change above it.
Check the details below, replacing info@example.com with your email address.
Click More Settings… and open the Outgoing Server tab. Make sure My outgoing server (SMTP) requires authentication is ticked and Use same settings as my incoming mail server is selected.
Open the Advanced tab. We recommend enabling SSL/TLS for both servers. If you use SSL, set the Outgoing server (SMTP) port to 465; otherwise use 587. Click OK, then Next.
Click Finish to save your changes.

Outlook 2007
Create a new account in Outlook 2007
If you’re starting Outlook 2007 for the first time, the Add New E-mail Account wizard opens automatically. Otherwise, open Tools > Account Settings and click New on the E-mail tab.
Tick Manually configure server settings or additional server types and click Next.
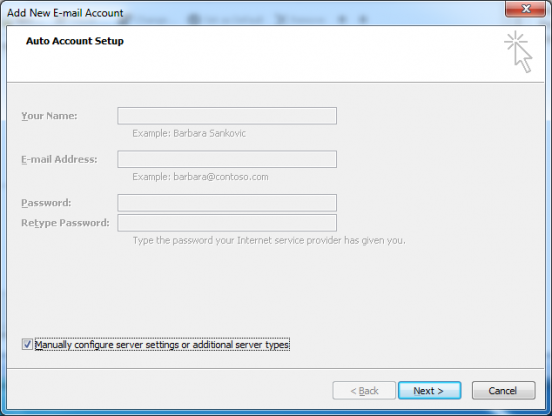
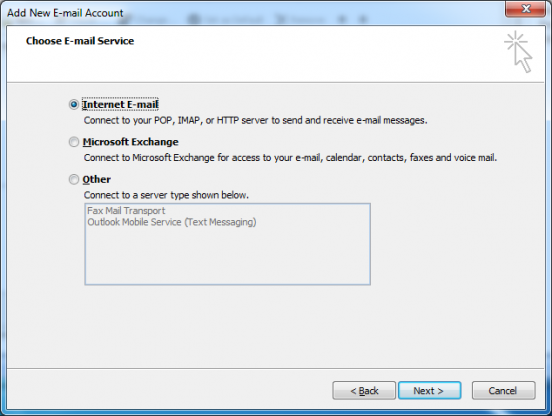
Select Internet E-mail and click Next.
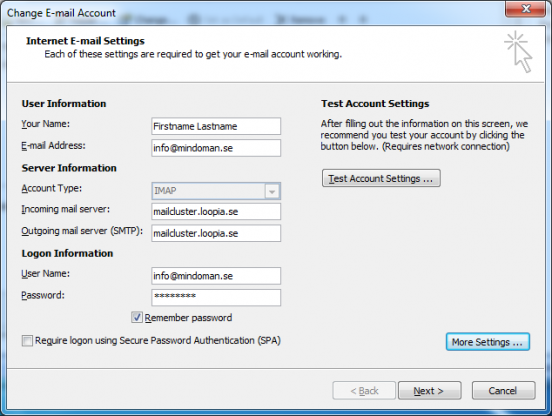
Fill in the account details below, replacing info@example.com with your email address. Incoming and outgoing servers are both mailcluster.loopia.se. To use POP3 instead of IMAP, change Account Type.

Click More Settings… and open the Outgoing Server tab. Tick My outgoing server (SMTP) requires authentication and check that Use same settings as my incoming mail server is selected.

Open the Advanced tab. We recommend enabling SSL/TLS for both servers. If you use SSL, set the Outgoing server (SMTP) port to 465; otherwise use 587. Click OK, then Next.

Click Finish.

Edit an existing account in Outlook 2007
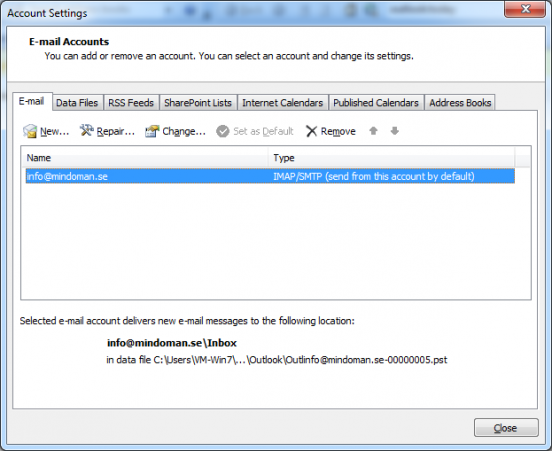
Open Tools > Account Settings, select your email account, and click Change above the list.
Check the details below, replacing info@example.com with your email address.
Click More Settings… and open the Outgoing Server tab. Make sure My outgoing server (SMTP) requires authentication is ticked and Use same settings as my incoming mail server is selected.
Open the Advanced tab. We recommend enabling SSL/TLS for both servers. If you use SSL, set the Outgoing server (SMTP) port to 465; otherwise use 587. Click OK, then Next.
Click Finish to save your changes.
Outlook 2003
Create a new account in Outlook 2003
If you’re starting Outlook 2003 for the first time, the Add New E-mail Account wizard opens automatically. Otherwise, open Tools > E-mail Accounts, choose Add a new e-mail account and click Next.
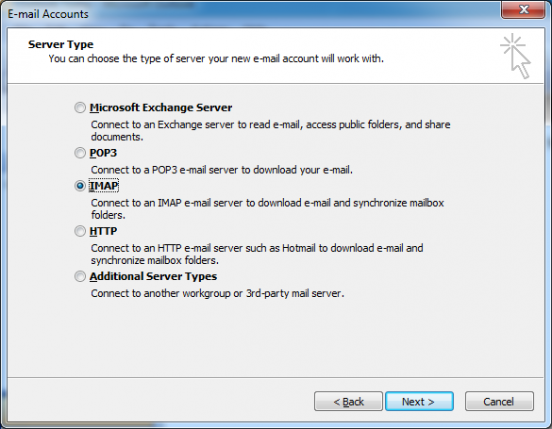
Tick the IMAP option (or POP3 if you prefer) and click Next.
Fill in the account details below, replacing info@example.com with your email address.
Click More Settings… and open the Outgoing Server tab. Tick My outgoing server (SMTP) requires authentication and check that Use same settings as my incoming mail server is selected.

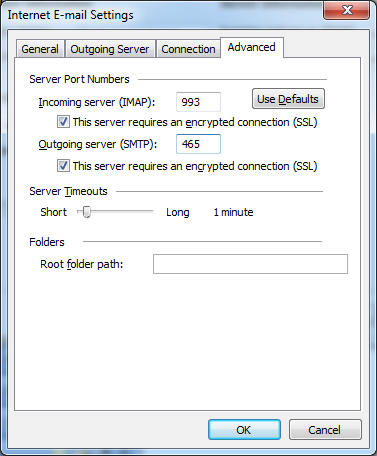
Open the Advanced tab. We recommend ticking This server requires an encrypted connection (SSL) for both servers. If you use SSL, set the Outgoing server (SMTP) port to 465; otherwise use 587. Click OK, then Next.

Click Finish.

Edit an existing account in Outlook 2003
Open Tools > E-mail Accounts. In the first window, tick View or change existing e-mail accounts and click Next. Select your email account in the list and click Change to the right.
Check the details below, replacing info@example.com with your email address.
Click More Settings… and open the Outgoing Server tab. Make sure My outgoing server (SMTP) requires authentication is ticked and Use same settings as my incoming mail server is selected.
Open the Advanced tab. We recommend ticking This server requires an encrypted connection (SSL) for both servers. If you use SSL, set the Outgoing server (SMTP) port to 465; otherwise use 587. Click OK, then Next.
Click Finish to save your changes.