Mail (Lion)
Below we have put together a guide on how to configure Mail in Mac OS X 10.7 (Lion) to be able to retrieve and send e-mail. Click on the images to view them in larger size. Some differences may exist between different versions and languages, but it should be easy to follow this guide even if you use a different version of Mail.
Set up a new account
Start the program according to the supplied instructions. If you start the program for the first time, the setup wizard Welcome to Mail will open directly, otherwise, go into the menu Mail and select Preferences. Click Accounts and then the plus (+) button at the bottom left.
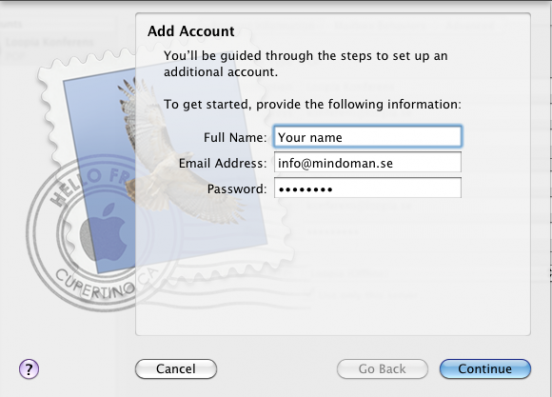
Enter the following:
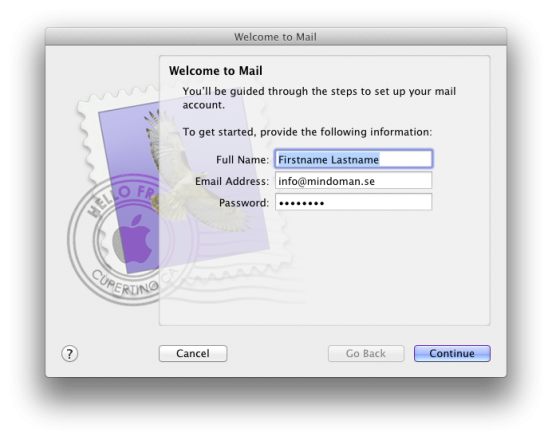
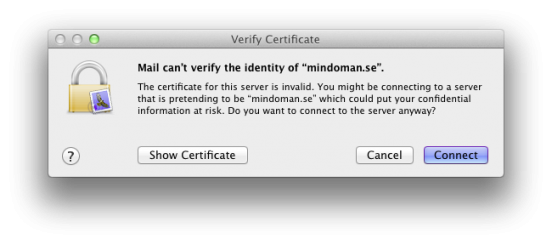
Then click Continue. A pop-up will show, click Accept on this warning:
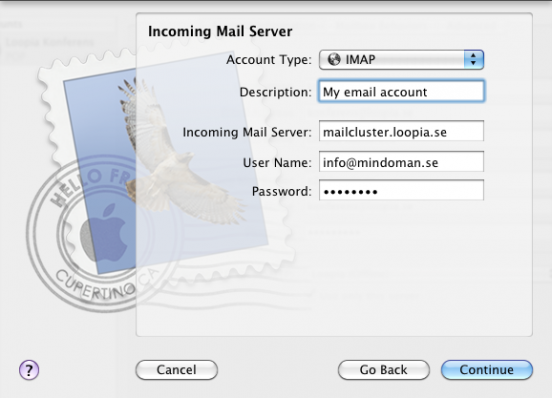
In this example we choose IMAP as Account Type, if you want, you can use POP3 instead. Then enter the following information:
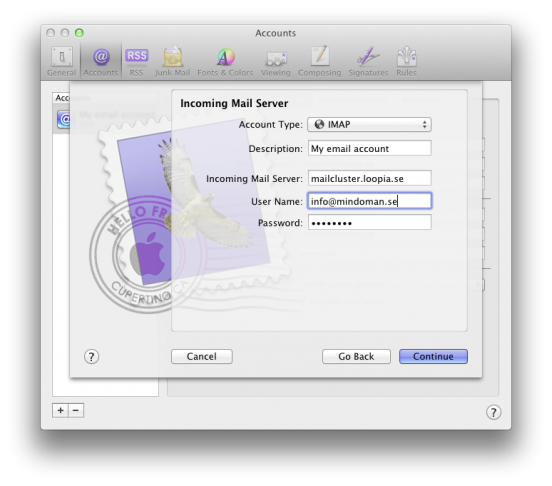
Then click Continue.
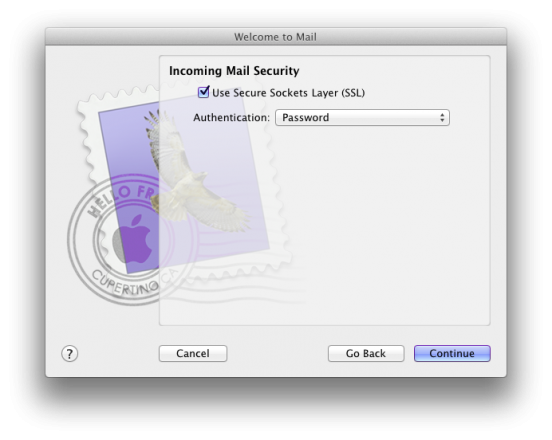
In the next window, check that Use Secure Sockets Layer (SSL) is ticked, and Authentication is set to Password.
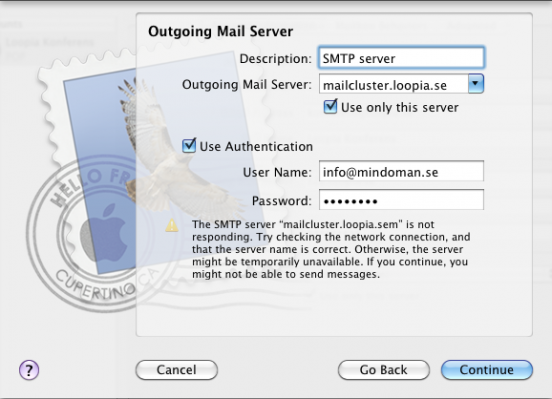
In the next window, enter the following:
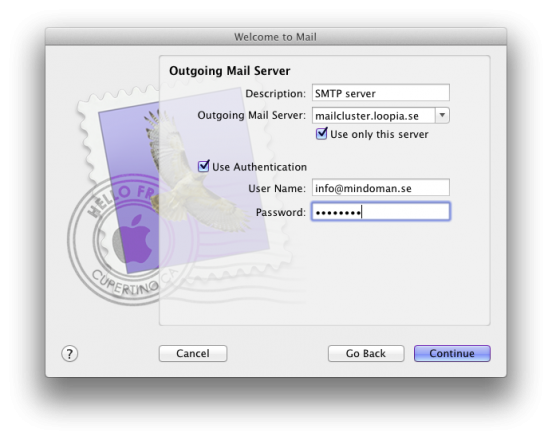
Check Use Authentication and verify that the username and password is entered. Then click Continue. In the next window, check that Use Secure Sockets Layer (SSL) is ticked, and Authentication is set to Password.

Then click Continue.
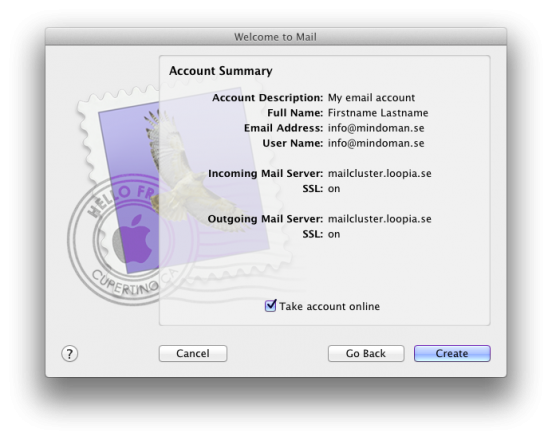
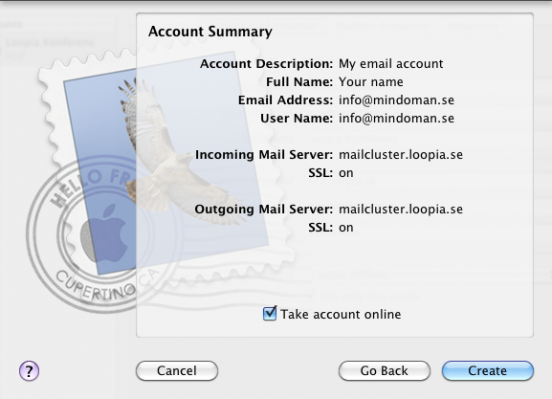
Finally, check that Take account online is ticked, and then click Create and you are done.
We also recommend that you follow the steps under #Save_Sent_and_Trash_on_the_server so that your folders and messages are synchronized correctly with us and your Mail-program.
Edit an existing account
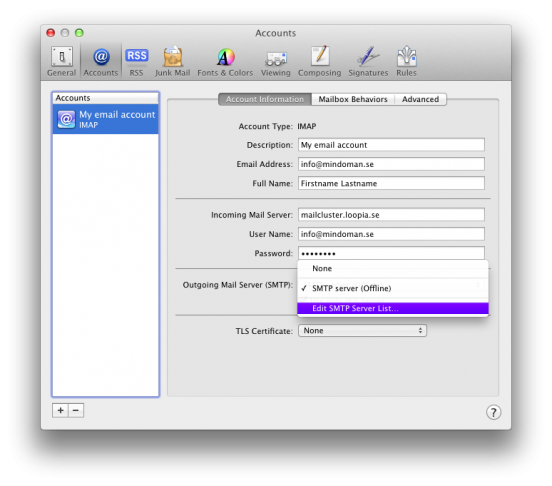
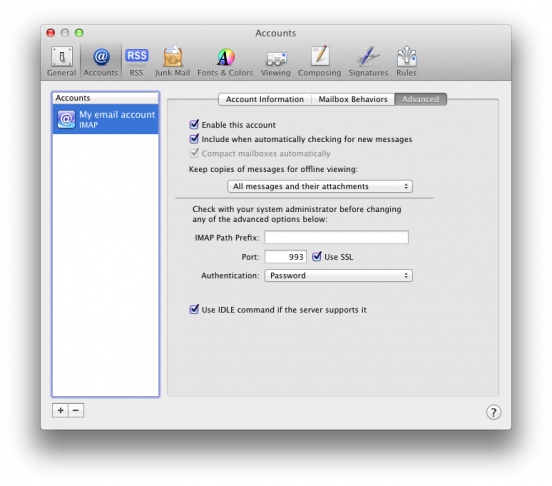
If you already have an account in Mail, but are having trouble sending or receiving messages, you might need to change a few server settings. To access these settings you first need to go to the Mail-menu, then click on Preferences, and lastly on the Account-tab.
Select your e-mail account in the left column, and select Edit SMTP server list… in the drop down menu for Outgoing Mail Server (SMTP):
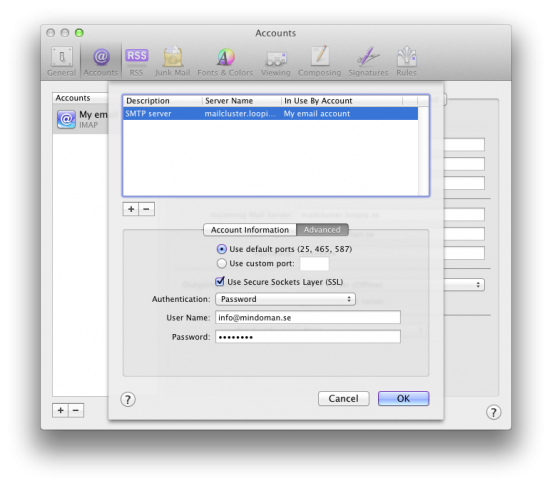
Here you need to check that Server Name is set to mailcluster.loopia.se, then go to the tab called Advanced. Check that Use default ports (25, 465, 587) is ticked and if you wish to use SSL (encryption) also tick the checkbox for Use Secure Sockets Layer (SSL). Lastly you need to check that Authentication is set to Password, that the User Name is your full e-mail address and that your password is filled in the Password-box:
Then click on the OK-button to save these settings, and in the previous window click on the underlying tab Advanced, check that the Port is set to 993 if you want to Use SSL, otherwise set it to 143 for IMAP, and 110 for POP3 to be able to receive messages. Also check that Authentication is set to Password:
You are now done, close the Accounts-window to save the new settings.
Save Sent and Trash on the server
Mac Mail isn’t saving your sent and removed messages on the server by default, this means that messages you send while using Mac Mail isn’t synchronized with your other peripherals connected to your e-mail address or via our webmail.
You can follow the simple steps below to make your messages synchronized with the server instead of saved locally in your Mac Mail.
We recommend that you let Mail completely synchronize all your messages at least once before you do these step.
If you don’t already see your folders in the left column of Mac Mail, you have you click Show directly under the button to create new messages. If you still can’t see the folders; please log into the webmail to create them.
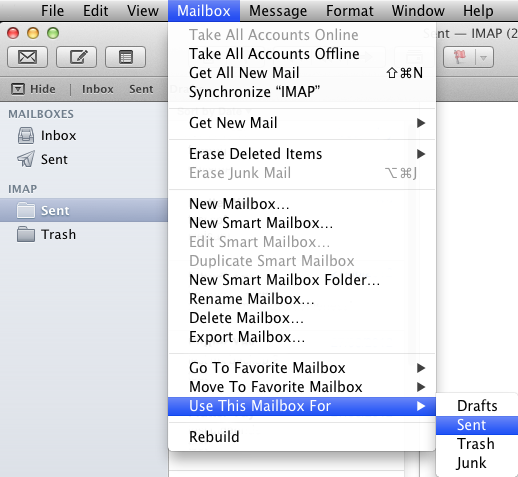
When you’ve done this, click on the Sent-folder just under your account/e-mail address in the left column and then go to the menu called Mailbox, in this menu select Use this mailbox for and finally Sent.
Mac Mail will re-synchronize which can take anything from a few seconds up to a few minutes depending on how many messages you have in this folder on the server.
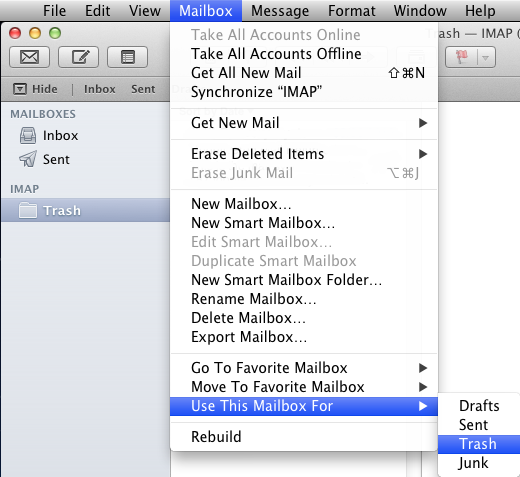
When this process is done, click on the Trash-folder just under your account/e-mail address in the left column and then go to the menu called Mailbox, in this menu select Use this mailbox for and finally Trash.
Mac Mail will re-synchronize which can take anything from a few seconds up to a few minutes depending on how many messages you have in this folder on the server.
When you have completed both steps you might have to restart the Mail-program completely if you messages aren’t showing correctly.
Mail (Snow Leopard)
Below we have put together a guide on how to configure Mail in Mac OS X 10.6 (Snow Leopard) to be able to retrieve and send e-mail. Click on images to view them in larger size. Some differences may exist between different versions and languages, but it should be easy to follow this guide even if you use a different version of Mail.
Start the program according to the supplied instructions. If you start the program for the first time, the setup wizard Welcome to Mail will open directly, otherwise, go into the menu Mail and select Preferences. Click Accounts and then the plus (+) button at the bottom left.
Enter the following:
Then click Continue.
In this example we choose IMAP as Account Type, if you want, you can use POP3 instead. Then enter the following information:
Then click Continue.
In the next window, enter the following:
Then click Continue.
Check Use Authentication and verify that the username and password is entered.
Then click Continue.
Finally, click Create and you are done.