This guide shows how to add your Loopia email account to the Mail app on an iPhone or iPad, step by step. The screenshots are from iOS 14, but the same procedure works on later versions of iOS and iPadOS. If you run into problems, follow the guide from start to finish and compare each screen with the screenshots.
Step 1: Open the Add Account screen
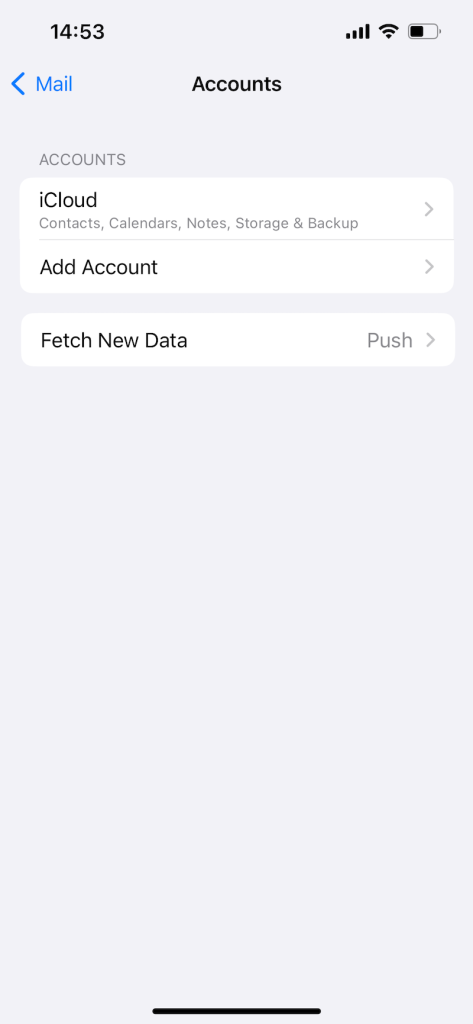
Open the Settings app, scroll down to Mail, then tap Accounts and Add Account.
Step 2: Choose Other
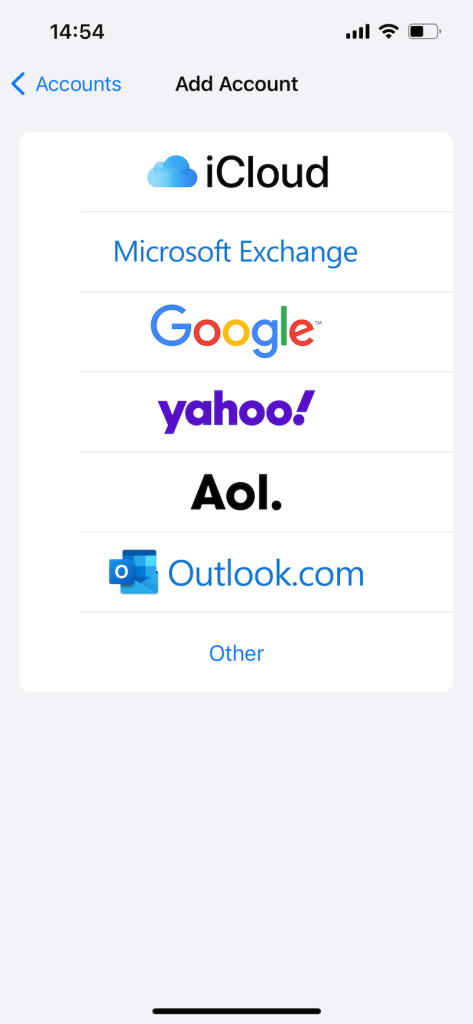
Loopia accounts aren’t listed as a preset provider, so select Other at the bottom of the list of mail providers.
Step 3: Tap Add Mail Account
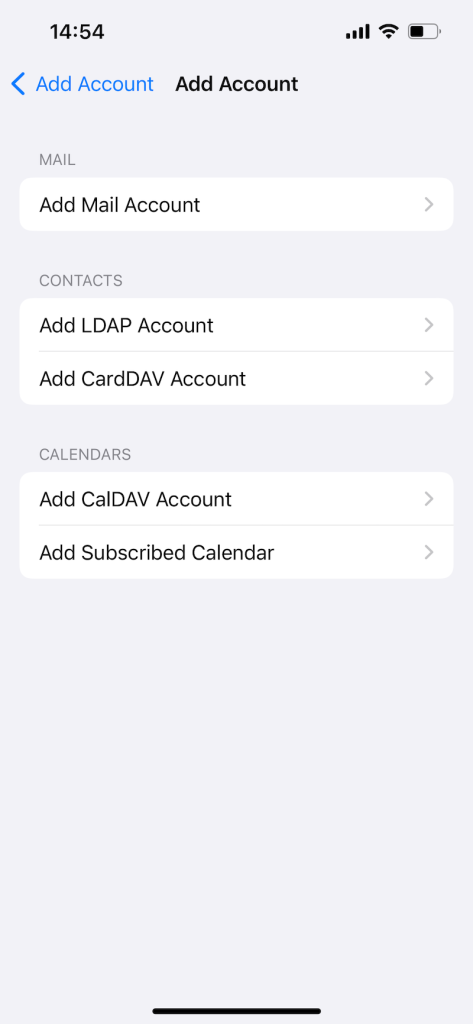
On the next screen, tap Add Mail Account.
Step 4: Enter your account details
Fill in the following information:
- Name: the name that will appear as the sender on outgoing messages.
- Email: your full Loopia email address.
- Password: the password for that email address.
- Description: a label that helps you tell this account apart from other mail accounts on your device.
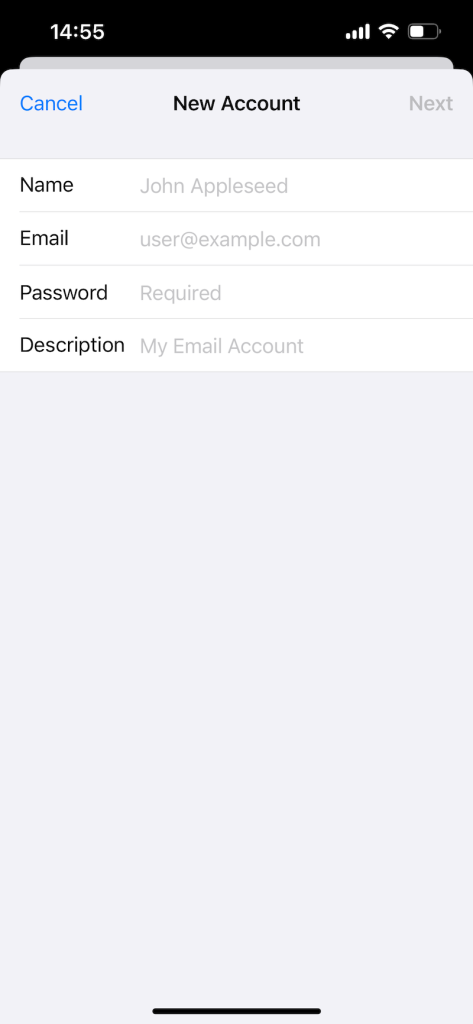
Important: fill in every field, including those marked as optional. The Loopia mail server requires authentication, so all the fields must contain your account details.
Step 5: Enter the Loopia mail servers
Your device will try to verify the information automatically. When it asks for server details, fill them in as follows.
Incoming mail server (IMAP):
- Host name: mailcluster.loopia.se
- Username: your full email address
- Password: the password for that email address
Outgoing mail server (SMTP):
- Host name: mailcluster.loopia.se
- Username: your full email address
- Password: the password for that email address
When all the fields are filled in, tap Next.
Step 6: Save the account
On the final screen, turn off the Notes toggle (Loopia accounts don’t support Notes synchronisation) and tap Save.
Your Loopia email account is now ready to use on your iPhone or iPad.