This guide shows how to create an email address (mailbox) for your domain in the Loopia Customer Zone. If you already have an email address and want to add it to your email program (Outlook, Apple Mail, Thunderbird, iPhone, Android), see our email setup guides instead.
Open the email creation wizard
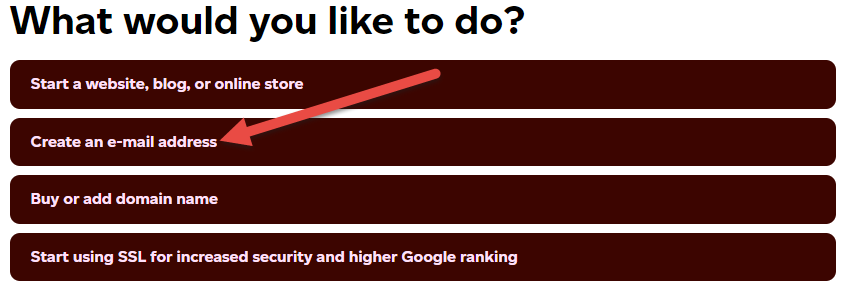
Log in to the Loopia Customer Zone. On the front page, find the What would you like to do? section and click Create an email address.
Choose between a mailbox and an alias
On the next page you have two options:
- Create an email address — creates a full mailbox with storage on Loopia’s servers. Choose this if you want to send and receive email and use the address with an email program such as Outlook, Apple Mail or a phone.
- Create an email alias to forward emails to for example Gmail or Hotmail — creates a forwarding address (email alias) only. Nothing is stored on our servers; incoming mail is forwarded straight to an existing address you choose.
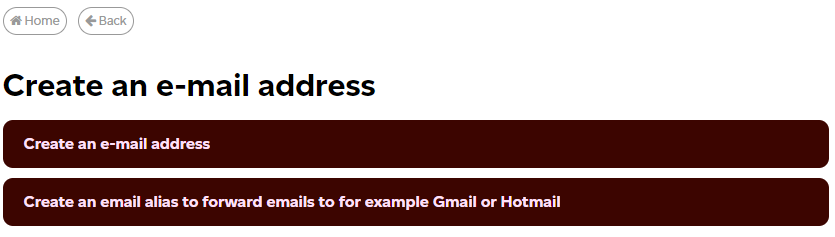
This guide covers creating a full mailbox. For the forwarding option, see Forward emails through the Customer Zone.
Select the domain and enter the address
Click Create an email address. On the next page, use the drop-down menu to choose the domain the email address should belong to.
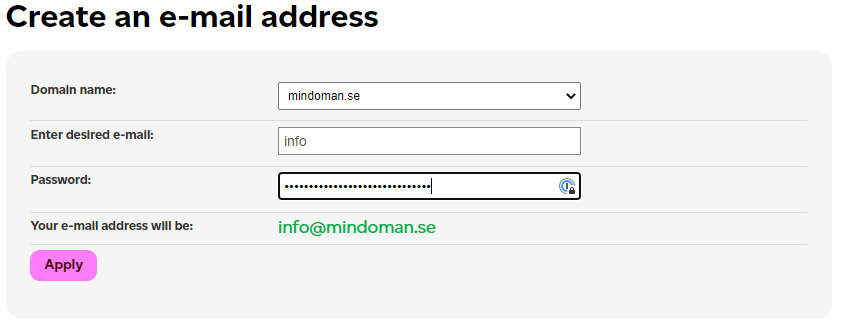
In the Enter desired email field, type the part of the address before the @ sign (for example info). The form fills in the rest from your selected domain.
Set a password
Enter a password and click Apply. The password must be at least six characters long and should not contain special characters such as ! ” # ¤ % & / ? = or the letters æ ø å.
If everything went well, you’ll see the message Congratulations! Your new email is now created.
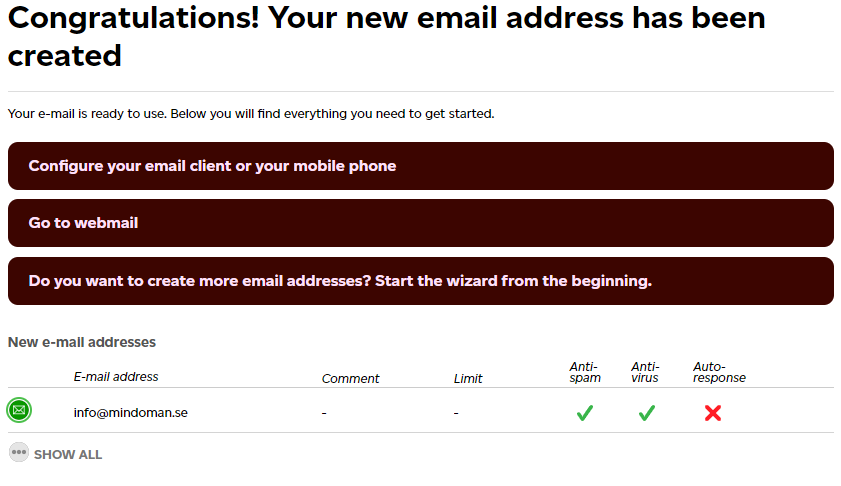
Configure auto reply, forwarding, antivirus and spam filter
To set up an auto reply (out-of-office message), forwarding, antivirus (virus filter) or anti-spam (junk mail filter) for the new address, go back to the front page of the Customer Zone, click your address under Email addresses and choose the feature you want to configure.