With the help of this guide, you will learn how to add your email to your iOS device. If you encounter difficulties of any kind during the installation, we recommend that you follow the guide from start to finish and compare it with the pictures that describe the installation.
Time to get started!
- Open the settings, scroll down to Mail and select Accounts and then Add Account.

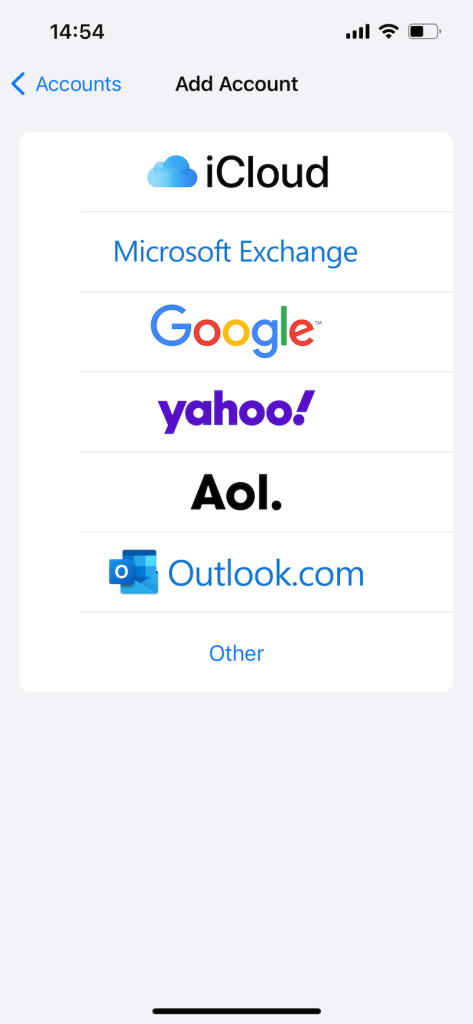
2. Select the Other option at the bottom.
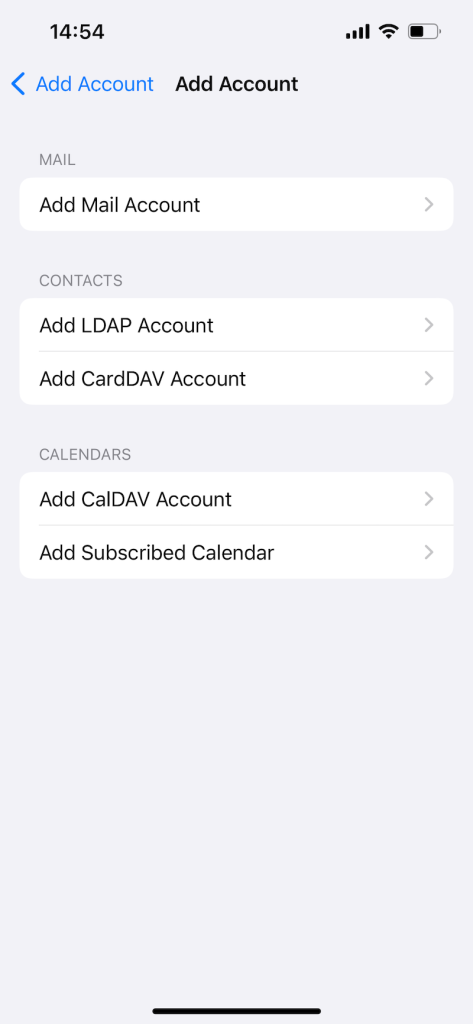
3. Select the Add Mail Account option.
4. A box will appear where you fill in the following information:
Name: This is the name that will appear as the sender
Email: Your email address
Password: The email address’s password
Description: If you have multiple email accounts, the description is what differentiates them.
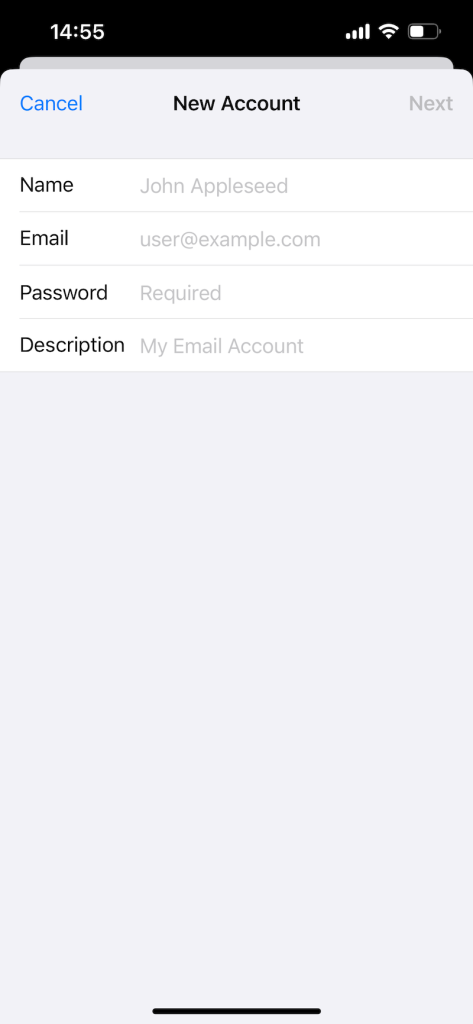
Please note that you must enter the requested information i all fields, even if they are marked as optional, as our server requires you to authenticate with your information.
5. Now the device will try to verify the information automatically, but you will soon be greeted by a new box where you will have to fill in all the information for your account. These data are as follows:
Now fill in server for incoming email:
Host name: mailcluster.loopia.se
Username: Your email address
Password: The email address’s password
Then fill in server for outgoing email:
Host name: mailcluster.loopia.se
Username: Your email address
Password: The email address’s password
When you have filled in all the fields, click Next.
Almost done!
6. In the last step, uncheck the Notes option and press Save.
DONE! You can now start sending emails with your iOS device!