ASP.NET (Microsoft web framework) provides a built-in FileUpload server control for handling file uploads on Loopia Windows hosting. This guide shows how the basic upload code works and what to consider regarding folder paths and security.
In plain classic ASP, there is no built-in file upload management, but you can use third-party components such as ASP Upload. In ASP.NET there is a built-in function for this. For example, you can use FileUpload, which is a complete, built-in server control.
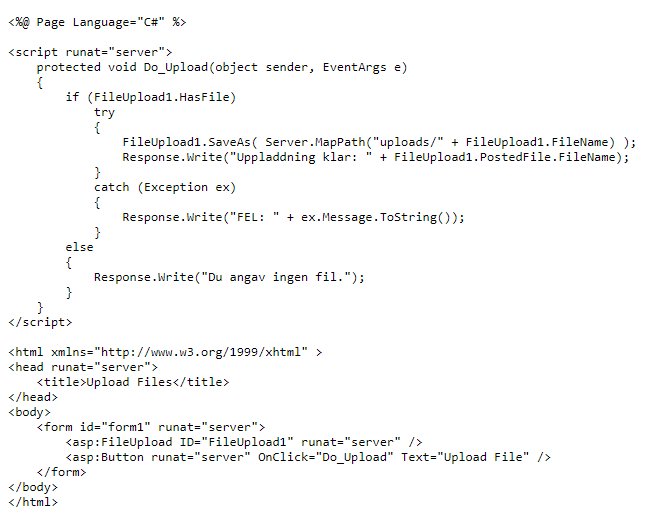
Example upload code
The code looks like the following for a simple upload feature. Do not copy the code below directly without having some form of control over which files may be uploaded. If you do not validate uploads, you will expose your website to a very serious security risk.
Create the upload folder
In addition to entering the code above, you must also create a folder, for example called uploads, and refer directly to this folder in Server.MapPath(). Otherwise the upload will not work.
How the page looks
If you have done it correctly, your upload page will look more or less like the example below. It is just a simple file selector and a button to upload the file. When you upload a file, you will see the name it is stored under.
