If you have installed a plugin that causes issues, deleted something by mistake, or want to roll back your website for any other reason, you can restore a previous backup directly from the Loopia Customer Zone (kundzon, account dashboard). This guide shows you how to restore both web files and a MySQL database (database backup) from Loopia’s automatic backups.
This guide describes something that we at Loopia can also do for you for a fee if you do not want to do this yourself. For current prices, send an email to support@loopia.se.
Note: If your website uses a database (for example WordPress), you must restore both the web files and the database.
Restore web files
Start by logging in to your Customer Zone and click the domain name for which you want to restore the web backup. If you cannot find your domain in the Domain names list, search for it in the Search your services search box and then click your domain.
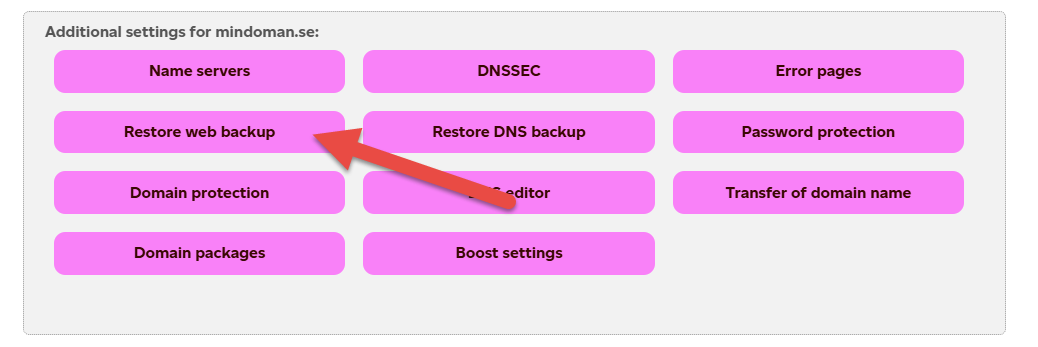
A new section will open. Scroll down to Additional settings for your domain name and click Restore web backup.
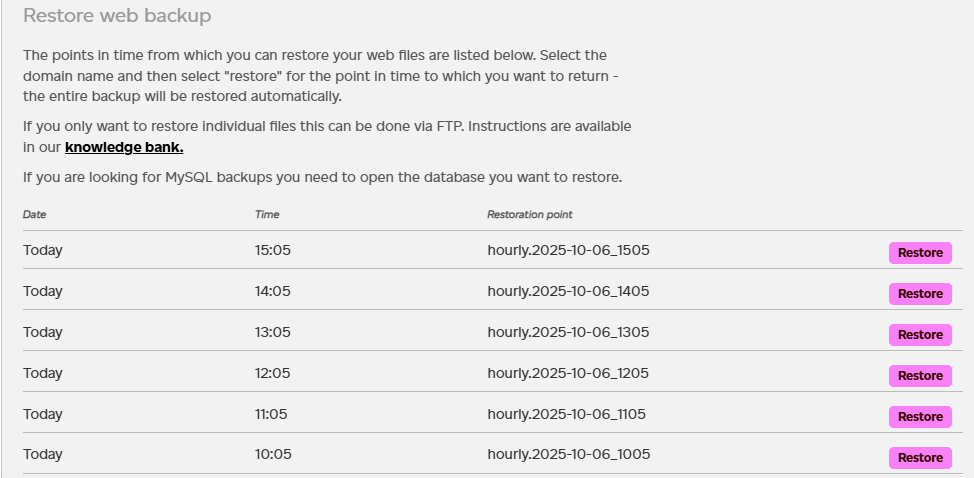
The page will expand and show all available backups together with the time and date when each backup was created. The newest backup is always shown at the top of the list. When a new backup is created, older ones move down in the list.
Backups marked as hourly are saved once per hour, daily backups are saved once per day, and weekly backups are saved once a week (just before Monday).
Click Restore on the same line as the backup you would like to restore.
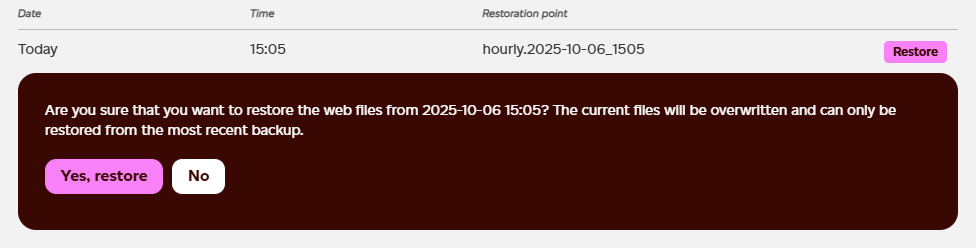
The row will expand and let you confirm or cancel the restoration. To continue, click Yes, restore.
Note that web files created since the chosen restore point will be deleted and changes will be undone.
The time the restoration takes depends on how many files are restored. You will see a confirmation message when the restoration has started, but the website may be unresponsive while it runs. During this time you may see a 403 error message on your website until the restoration is complete.
Restore MySQL database
If restoring the web files did not fully solve the problem, the issue may be tied to your database. In that case, restore the database (MySQL) as well.
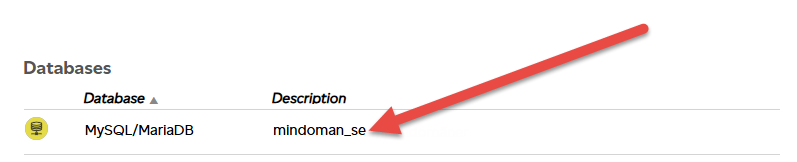
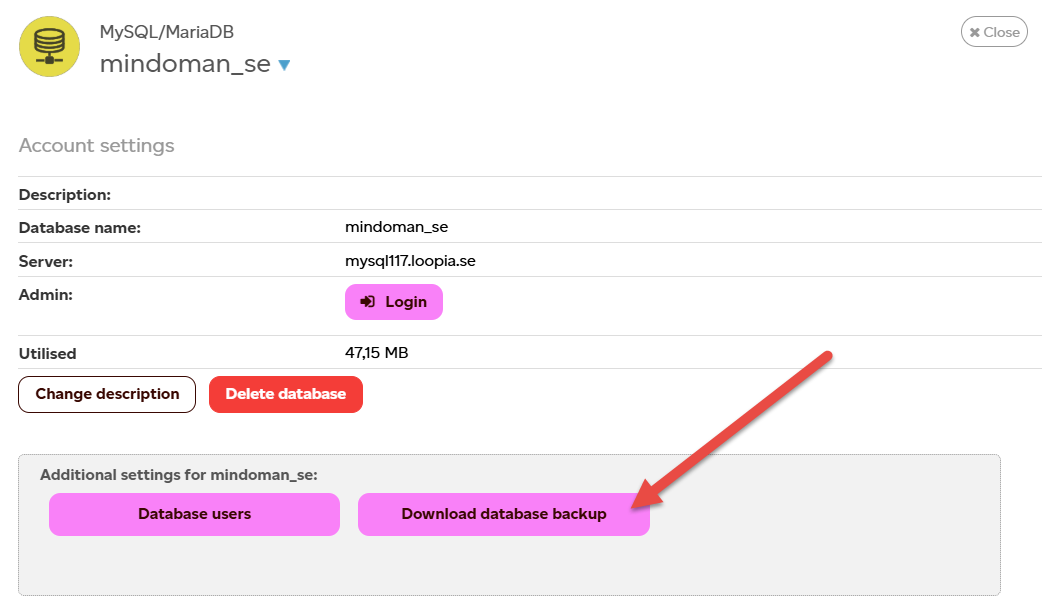
At Loopia we automatically back up your database every night and keep these backups for 7 days. They are available from your Customer Zone. To find them, click a database in the Databases list.
Download a database backup
Once you have clicked your database, you will see more settings for it. Click Download database backup.
You will see a list of all backup restore points. Click Download on the same line as the backup you would like to restore.
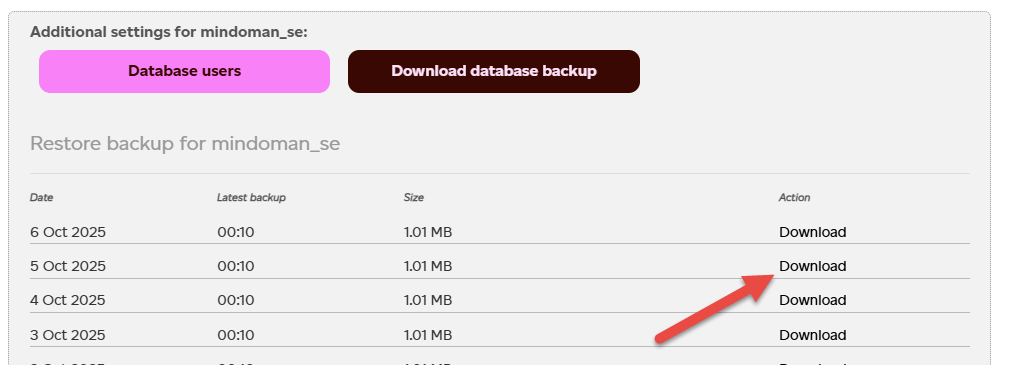
The backup file is saved locally as a compressed .bz2 file. You do not need to decompress it or make any manual changes if you want to restore the entire database.
Create a database user for phpMyAdmin
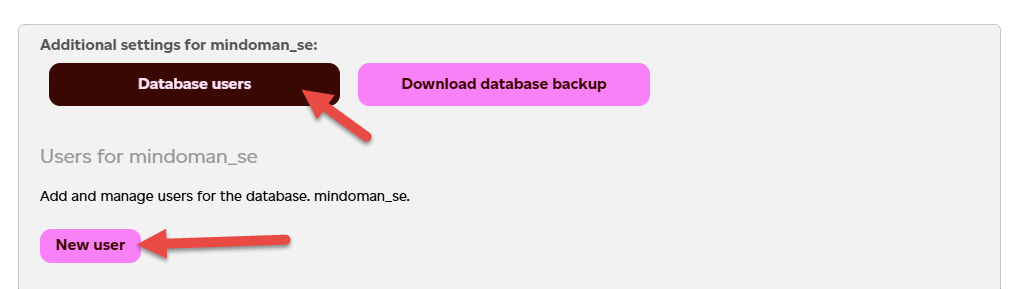
To restore the database you need to log in to phpMyAdmin (database admin tool). Websites often use existing database users, so if you are not sure which user to log in with, create a new user and give it the rights required to import the backup.
Click Database users and then New user to create a new user.
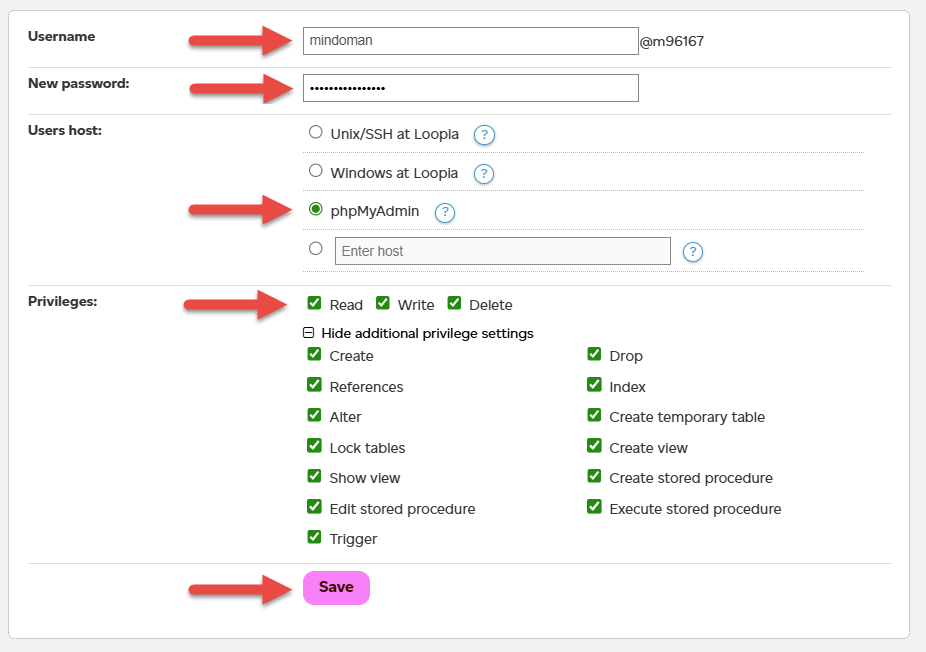
Choose a username and password to log in with. Select phpMyAdmin as the user’s host, expand the privilege settings, and tick all the checkboxes. Finally, click Save.
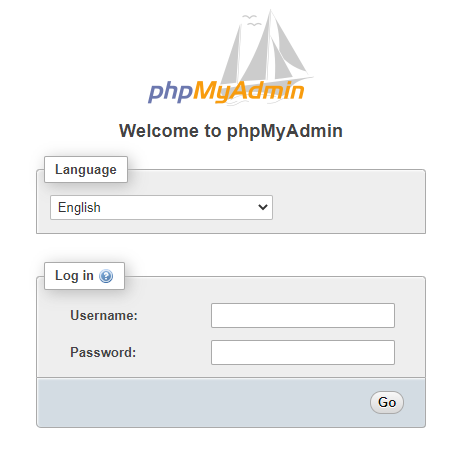
Log in to phpMyAdmin
After saving these settings, log in to phpMyAdmin to import the database backup. Click the Login button on the same page as the other settings.

On the phpMyAdmin login page, enter the username and password you just created and click Go (or press Enter).
Import the database backup
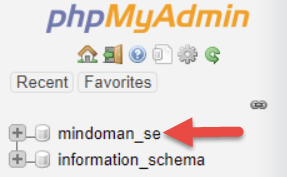
You are now logged in to phpMyAdmin, where the website database is managed. To select your database, click its name in the list in the top left.
Do not click on “information_schema” — importing into it will not have the desired effect.
After clicking your database, click the Import button.

Click Välj fil or Choose file to select the database backup file you downloaded earlier.
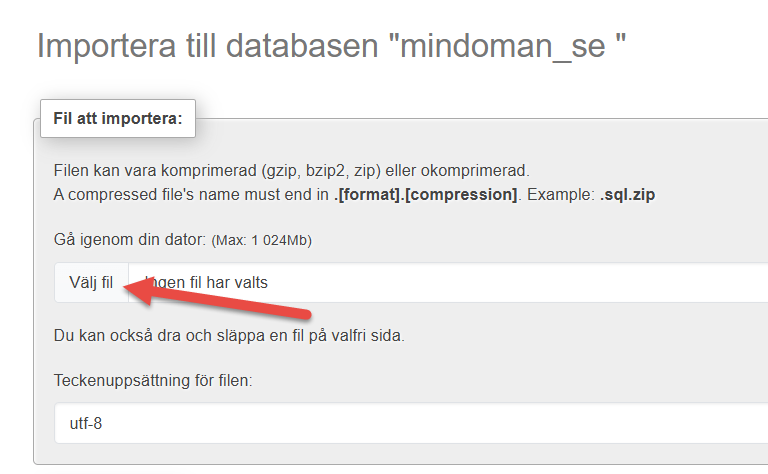
When you have chosen your file, click Importera or Import at the bottom of the page.
When the import is finished you will see a green confirmation message at the top of the screen. You can now log out from phpMyAdmin.

Your backup should now be restored.