Microsoft Access is a file-based database solution that is not appropriate for dynamic web sites. Although it is used extensively for just that. Instead, we highly recommend MySQL that part of your hosting package with us. MySQL is located on dedicated database servers that are configured to handle many simultaneous accesses. Therefore works MySQL excellent to very dynamic websites.
This guide describes how to easily migrate from Access to MySQL
The guide assumes that you have created a MySQL database through Loopia Customer zone and that you can connect to it directly from your computer. Also note that this guide assumes you have an empty MySQL database from the start. If your MySQL database already contains tables, make sure that your Access database does not use tables with the same name.
Contents
Install Access To MySQL
Access To MySQL is a Windows application with which you can directly export the contents of your .mdb file (your Access database) to your MySQL database. It is completely free and can be downloaded from here.
Once you’ve downloaded the .zip file and unpacked it (for example with WinZip or IZArc), start the installer by double clicking the .exe file. After the installation, start the program.
Here you see the program when it is started:
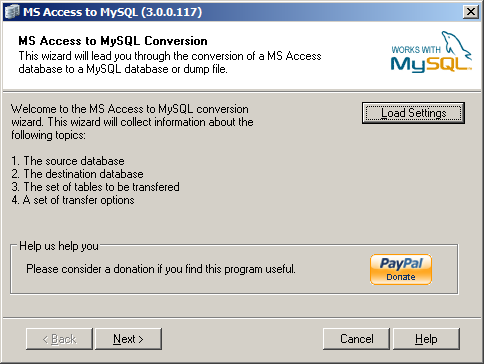
Click Next.
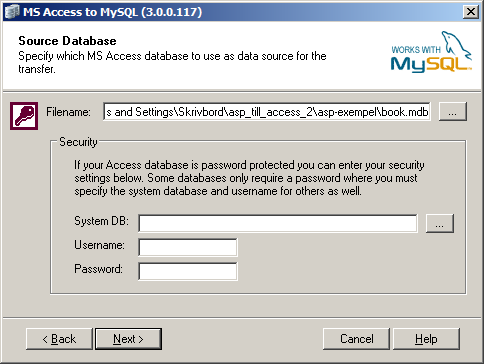
Here, click the button “…” to right of the field Filename and find your Access database (the format filename.mdb). If you have this on your web server with us, you first need to download the file to your computer using an FTP program.
Click Next.
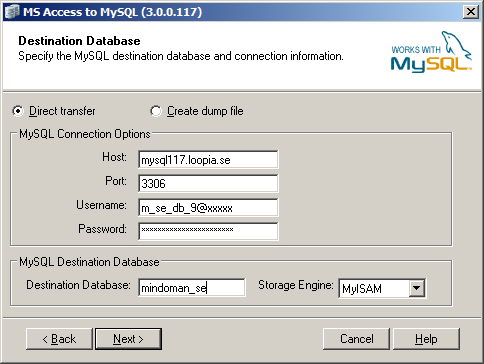
Here, click the option Direct Transfer. Then fill out the following fields with the following information:
- Host
- mysqlXXX.loopia.se (replace XXX with the number of your MySQL server)
- Port
- 3306
- Username
- Enter your username
- Password
- Enter your password
- Destination database
- The name of your MySQL database, for example mindoman_se
- Storage engine
- MyISAM
Click Next.

Make sure all the tables you want to transfer to the MySQL database are checked.
Click Next.
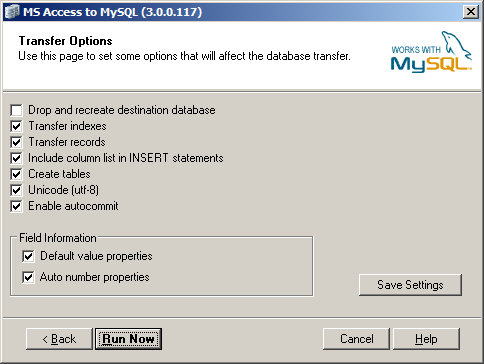
Make sure all boxes are checked as shown above. Only if you are sure of what you do, you should modify them.
Click Run Now.
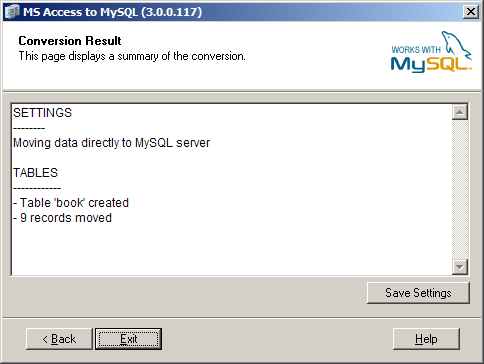
All data from your Access database has now moved into your MySQL database.
Update your ASP site
To allow your ASP page using it newly updated MySQL database instead of it old Access database, you must first update your connection string. You can do that like this (click here for instructions on ASP.NET):
A connection string for Access looks like this:
Dim connection_string
connection_string =
    "Provider=Microsoft.Jet.OLEDB.4.0;" &
    "Data Source=" & Server.Mappath("database.mdb") & ";" &
    "User Id=your_username;" &
    "Password=your_password;"
Replace it with:
Dim connection_string
connection_string = "Driver={MySQL ODBC 5.1 Driver};" &
 "Server=mysql117.loopia.se;" &
 "Port=3306;" &
 "Option=131072;" &
 "Stmt=;" &
 "Database=mindoman_se;" &
 "Uid=your_username;" &
 "Pwd=your_password"
Note that the connection string must be on one line and only in divided here to fit on the width. That is, everything from line number two in each code sample must be aligned.
What you need to add in the new connection string is the server name to your MySQL server (in the example above mysql117.loopia.se), the name of your database (in the example above mindoman_se), your username and password.
If you have connection strings in multiple files, all of the must be updated. When this is done and you have saved your files and uploaded them to your FTP account, your website will be MySQL-driven instead of Access-driven.
Congratulations!
Update your ASP.NET site
Updating the code in ASP.NET is a bit trickier than in ASP. Note that all code below is based on the sample we have available here in our knowledgebase about how to connect to Access or MySQL. For a better understanding of what the below code does, you can download the examples and read through the code.
First, you must replace the following namespace:
<%@ Import Namespace="System.Data.OleDb" %>
…and replace it with the following:
<%@ Import Namespace="System.Data" %>
<%@ Import Namespace="MySql.Data.MySqlClient" %>
After that it is the Page_Load() method that needs updating. In your code for connecting to Access, it should look something like this:
public void Page_Load(object Sender, EventArgs E)
{
  OleDbConnection oConn = new OleDbConnection();
  string strConn = "";
  string strResult = "The connection succeeded.";

  strConn = "Provider=Microsoft.Jet.OLEDB.4.0;data source=" +
    HttpContext.Current.Server.MapPath("path\to\your\database\db.mdb");

  try
  {
    oConn.ConnectionString = strConn;
    oConn.Open();
  }
  catch(OleDbException eDBOpen)
  {
    strResult = GetDBError(eDBOpen);
  }

  oConn.Close();
  LabelResult.Text = strResult;
}
This code shall be replaced with the following code (note that the characters \\ means that the line will not wrap):
public void Page_Load(object Sender, EventArgs E) {
  MySql.Data.MySqlClient.MySqlConnection conn;
  string myConnectionString;
  string strResult = "The connection succeeded.";

  myConnectionString = \\
    "server=mysqlxxx.loopia.se;uid=your_username@xxxxxxx; \\
    pwd=your_password;database=your_database;";

  try {
    conn = new MySql.Data.MySqlClient.MySqlConnection();
    conn.ConnectionString = myConnectionString;
    conn.Open();
    conn.Close();
  } catch (MySql.Data.MySqlClient.MySqlException ex) {
    strResult = GetDBError(ex);
  } catch (System.Net.Sockets.SocketException se) {
    strResult = GetDBError(se);
  }

  LabelResult.Text = strResult;
}
The declaration of the method GetDBError(), you should be replaced from this:
public string GetDBError(OleDbException e) {
…to this:
public string GetDBError(Exception e) {
If you have connection strings in multiple files, all of the must be updated. When this is done and you have saved your files and uploaded them to your FTP account, your website will be MySQL-driven instead of Access-driven.
Congratulations!
Install MySQLs ODBC driver
In order for the program Access To MySQL to connect to your MySQL database at Loopia an ODBC driver is necessary. If you are missing this, you can download it from mysql at this address.
After saving the .msi file to your computer, double click on the file to start the installation program. You will then be met by the following window:
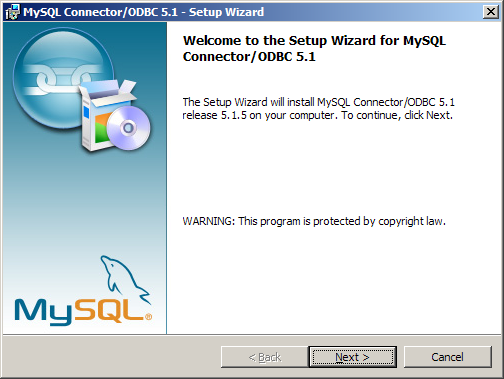
Click Next.
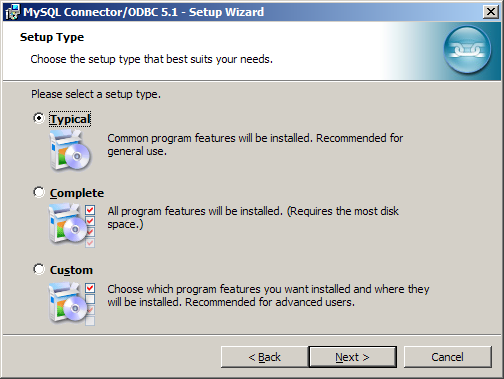
Select Typical and click Next.
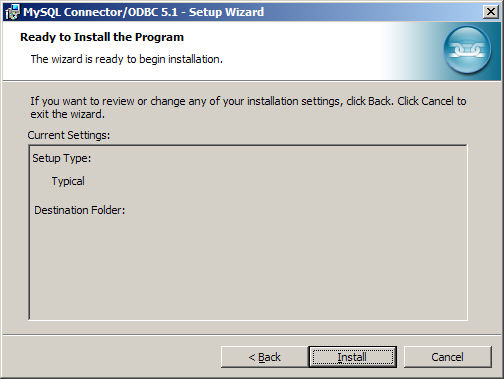
Click Install.
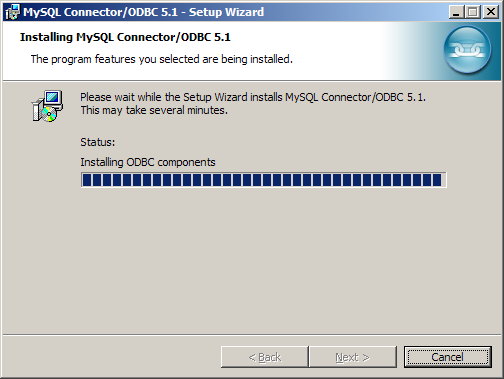
The driver is being installed now.
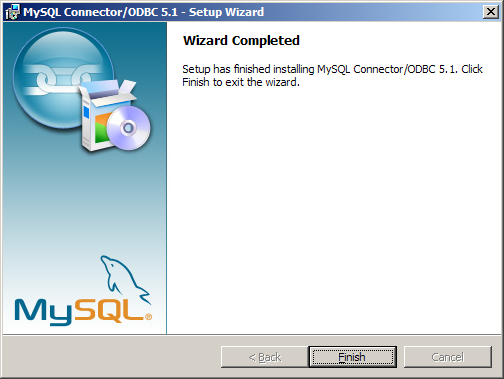
All done! Click Finish to exit Setup.