Missing a feature in WordPress? Someone else has probably already built a solution you can use. One of WordPress’s greatest strengths is the huge library of plugins (add-ons) you can install to extend it.
Welcome to the WordPress school! In this series we go through everything you need to know to get started with your own website in WordPress. We have already covered how to install WordPress and publish a post and how to change the theme (template). In this part we walk through how to find, install and use plugins in WordPress.
Use plugins for more features in WordPress
If your WordPress site were a car, the plugins (add-ons) would be the extras you can add, like GPS or heated steering. Just as those extras are not strictly necessary for the car to work, plugins are not necessary for your site to work – but they let you build pretty much any kind of website you can think of. With plugins you can protect your site against spam, optimise your text for search engines or simplify the design process.
Consider security when choosing WordPress plugins
Because WordPress uses open source code, basically anyone can create a plugin with almost any functionality and upload it for regular users like you and me to download.
In addition to keeping WordPress and your installed plugins up to date, you should also be careful about which plugins you download in the first place. Here are three things to keep in mind when choosing plugins, to help keep your WordPress site secure:
- Can the plugin be downloaded from a trusted source, such as wordpress.org?
- Has it received many good ratings and reviews from previous users?
- Has it been updated by the developer in the last six months?
How to install and activate a plugin in WordPress
Plugins are as easy to install as anything else in WordPress. Here is how:
- Log in to the WordPress admin panel (admin area, wp-admin).
- Click Plugins → Add New Plugin.
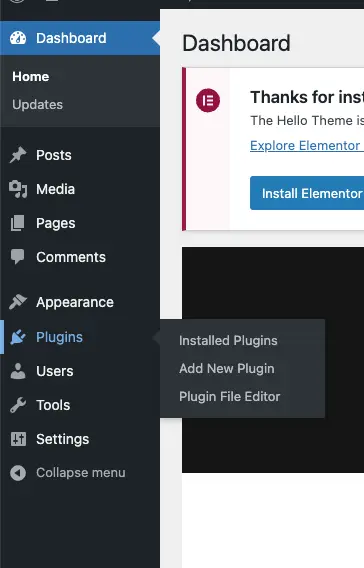
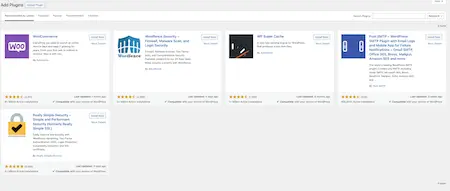
3. Find a plugin with the feature you want. Browse the popular, featured or recommended plugins, or search for a plugin by name or description. You will get a list of plugins that match your search.
4. Click More Details to read more about a plugin. In this example we use Yoast SEO.
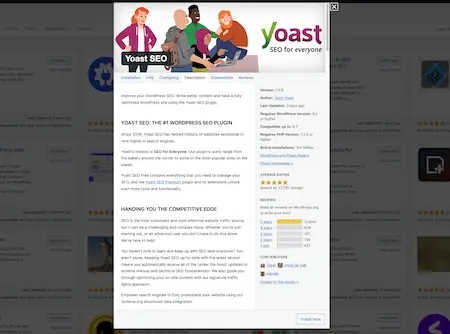
5. Click Install Now for the plugin(s) you want to use.
6. When the installation is complete, click Activate.
7. Done!
Change settings for a plugin
Once a plugin is enabled you can edit its settings, if it has any. Go to Plugins → Installed Plugins and click Settings for the plugin you want to adjust. The available settings depend on the plugin.

If you no longer use or need a particular plugin you can deactivate it. Go to Plugins → Installed Plugins and click Deactivate. Once deactivated, you can also delete the plugin from the same screen. In some cases a plugin can be so broken that you cannot access the admin panel to deactivate it. Then it is useful to know how to disable it manually:
- Navigate to your WordPress site’s root directory in your FTP program (for example, FileZilla).
- Locate wp-content/plugins/. This is where all your installed plugins are stored.
- Rename the folder for the misbehaving plugin. WordPress will no longer find the plugin and will deactivate it automatically. If you do not know which plugin is causing the problem, you can rename the entire plugins folder, which deactivates every plugin at once.
Add your own plugin
There are several other places you can get WordPress plugins besides the admin panel. You might download one from a website (just keep security in mind) or build your own. Either way, you need to upload the plugin to WordPress itself. The easiest way is:
- Log in to the WordPress admin panel.
- Click Plugins → Add New Plugin.
- Click Upload Plugin and follow the instructions.
That’s it – you now know how to install a WordPress plugin!
Installing a WordPress plugin is not very difficult, as you can see. Finding your way through the plugin jungle can be harder. Good luck – you will soon have a WordPress site that looks exactly the way you want it.
That is all for this part. In the last part of the WordPress school we look at how to turn your blog into a real website in WordPress.
Read more about the website tool WordPress at Loopia »
Missed a part of the WordPress school, or want to read the next one?
You can quickly and easily jump to one of the other parts here: