If you use Squarespace for your website, Squarespace asks you to add a number of DNS records (zone entries) at your registrar. This guide shows you how to add those records for a domain hosted at Loopia.
Find the records in your Squarespace control panel
The DNS records you need are listed in your Squarespace control panel. They normally look like the image below:
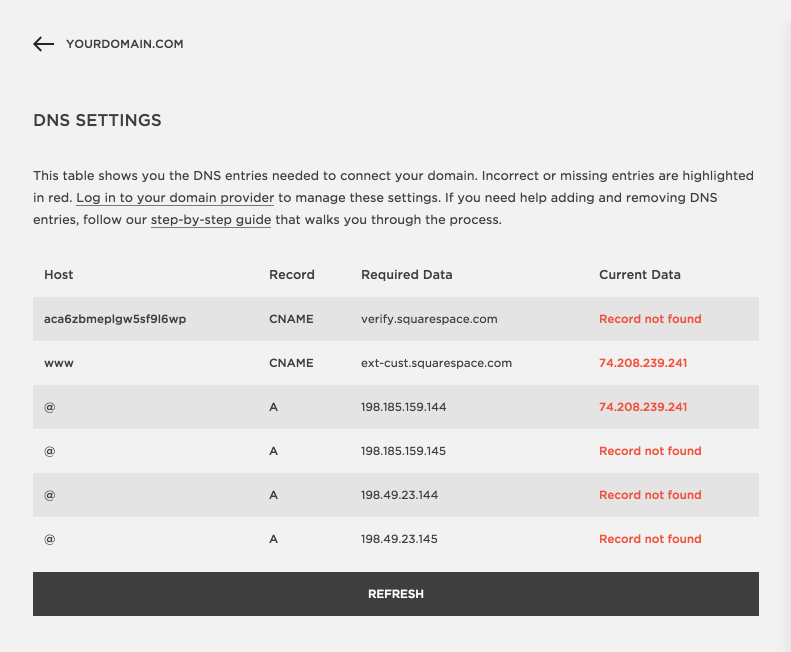
These records need to be added in the DNS editor for your domain name in the Loopia Customer Zone.
Check that your domain uses Loopia’s name servers
First, confirm that your domain uses Loopia’s name servers (DNS servers). Visit whois.loopia.se, enter your domain name and check that ns1.loopia.se and ns2.loopia.se are listed as the name servers. If the domain does not use our name servers, please contact the provider where the name servers are set, and add the requested records with them instead.
Park the domain before changing records
To prepare the domain for the new records, start by clicking the relevant domain name and choose to park the domain. Do this by clicking no settings → parked. This will not affect your email records, but any website you currently host with Loopia will be removed, since you are moving the website over to Squarespace.
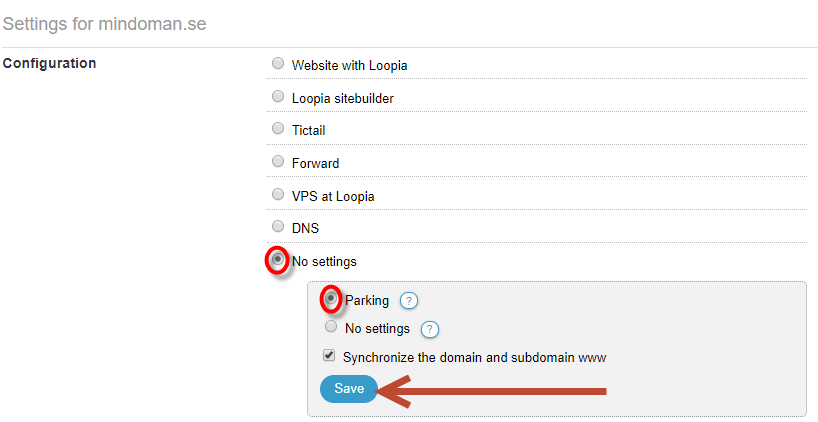
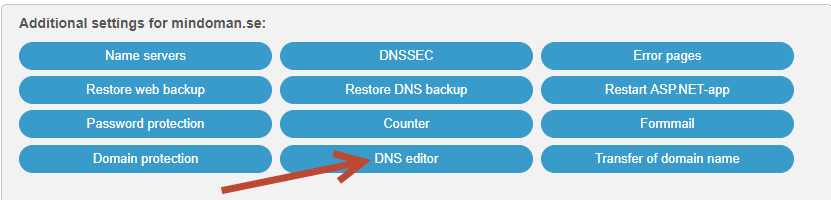
After parking the domain, choose DNS editor.
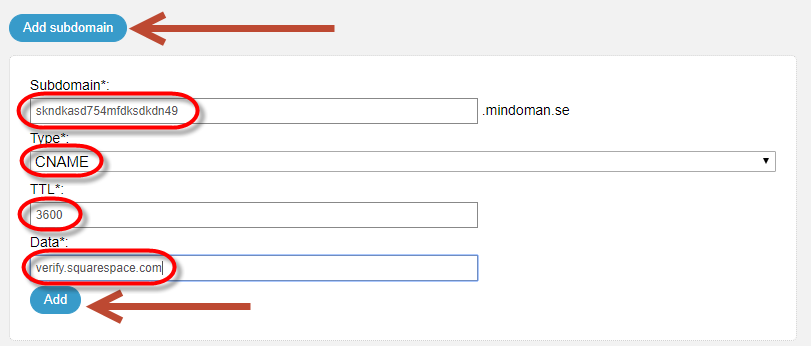
Add the Squarespace verification record
Now add and change a few records, starting with the verification record. The verification string (a long sequence of letters and numbers) proves to Squarespace that you control the domain. To add it:
- Select Add Subdomain.
- Enter the unique text string you received from Squarespace.
- Under Type, enter CNAME.
- Under TTL (time-to-live, propagation delay), enter 3600 or 300.
- Under Data, enter verify.squarespace.com.
- Click Add to save.
Squarespace should detect this verification within 24 hours, and your site will be visible to them once you have added the remaining DNS records.
Add the Squarespace A records on the @ subdomain
Next, add the IP addresses (usually four) that Squarespace uses. You do this in the DNS editor under the subdomain named “@“.
- Under the “@” subdomain, delete the existing A records — these have Type: A and an IP address as the value. Do not delete any other lines.
- Select Add a new Record under @, then enter each Squarespace IP address one by one and click Add.

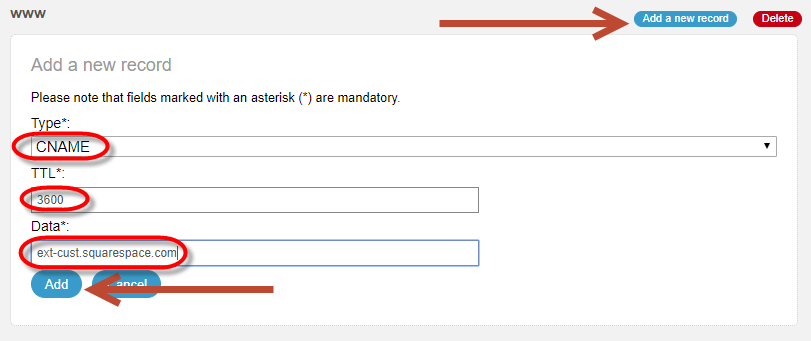
Add the CNAME for the www subdomain
After adding the IP addresses, scroll down to the www subdomain (e.g. www.example.com) in the DNS editor. If it does not exist, create it first. Then delete all existing DNS entries on the www subdomain and select Add Record.
Add a CNAME that points to ext-cust.squarespace.com, then click Add.
The new records will normally take effect within 24 hours.