This guide goes through how to easily install Woocommerce with our One Click Installer and how you then can change the look of your store and publish your first products.
See also our Woocommerce School for more tips. (Note that the school is only available in Swedish at the moment).
It is very easy to install WordPress e-commerce via Loopia. You do not have to download your own installation files, you will get full access to a complete Woocommerce installation in your account directly through our One Click Installer.
Log in to your Loopia Customer Zone and at the top of the homepage you will find our fast installs. Here you choose “Start a website, blog or online store”
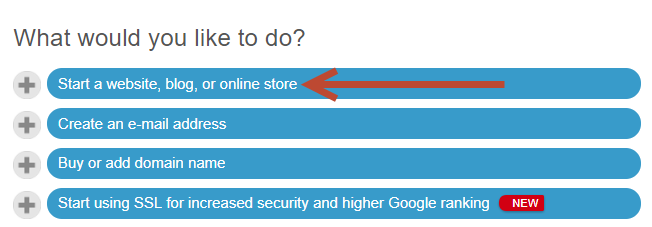
Then select “Start an online store (WordPress with Woocommerce)” from all of the options offered.

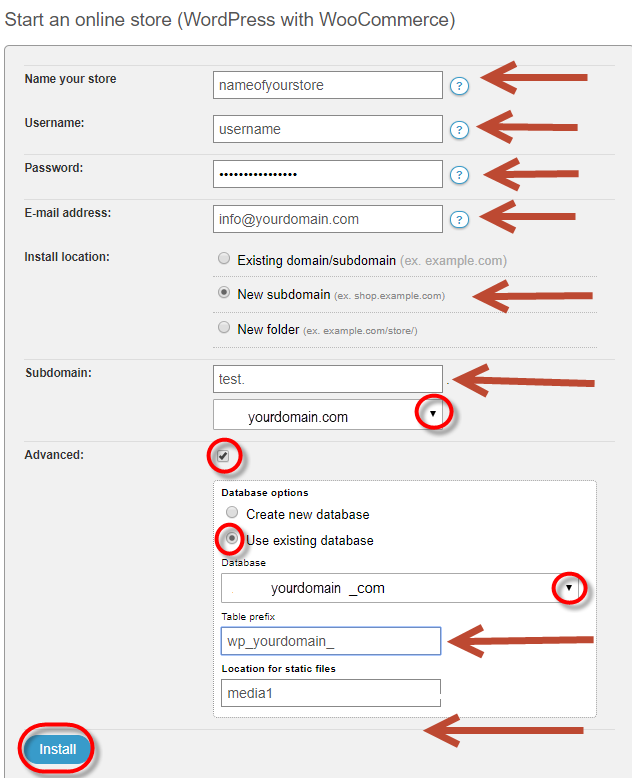
In the next window that appears fill in the basic information for the installation. The web page’s name, your username to access the administrative sections, password for this and an email address for the username.
After that, choose which domain name or sub domain you want to install your Woocommerce on. If the domain/s already exists then all web material on it will be deleted for the benefit of the new Woocommerce installation. Email settings are not affected by this.
Under “advanced“, you can also choose which database to use for the database tables required for WordPress. You can choose an existing one or create a new one.
You can also choose a space for your static material (photos, movies, etc.). You should leave this as it is.
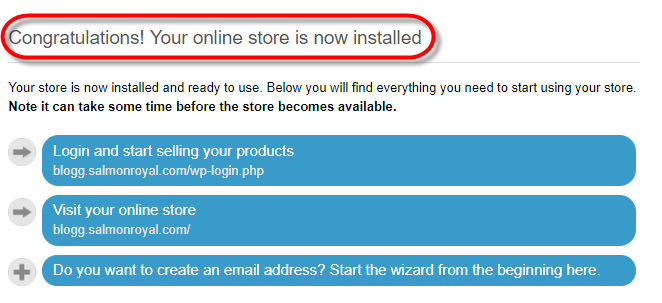
Once you have chosen to install, then it may take a few minutes before everything is installed and ready and you will receive a confirmation of this. Await 1 hour before you set in use.
If you install WordPress on a new domain/sub domain or on a domain/sub domain that previously had “Windows” or “Autobahn” as a configuration, it may take up to an hour before the page becomes available online when DNS has been updated for the domain. Please wait for 1 hour and the page will work soon.
We always look to have the latest stable version of WordPress/Woocommerce in the installation phase, but then it’s very important that you look to update your WordPress in association with new release of WordPress and plugins versions and security updates in your system. When you are logged in to the admin section of WordPress you will be notified of any updates needed.
Customize Woocommerce
Upon your first login on the page you will be offered to customize your shop. These customizations can be changed at a later date, but it can also be uploaded directly.
Click the “Run the Setup Wizard” to customize your store.

Here you can, among other things, choose currency too if you sell physical products. You can also customize payment options (also possible later). In order to choose what type of payment you want to use move the button to the right (turn on) or to the left (turn off). Below you can see the payment options Woocommerce provides:
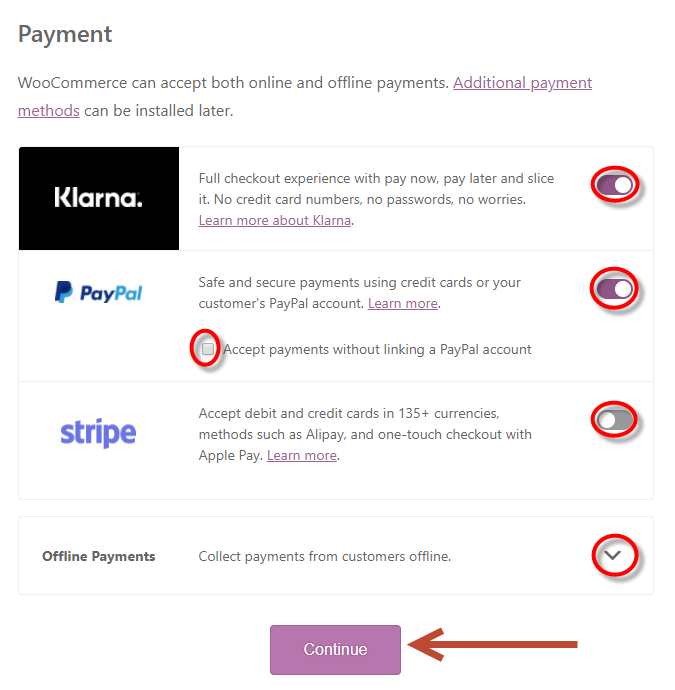
When you have chosen the payment solutions click on “continue“.
Choose the shipment type (if any), the cost (or none).
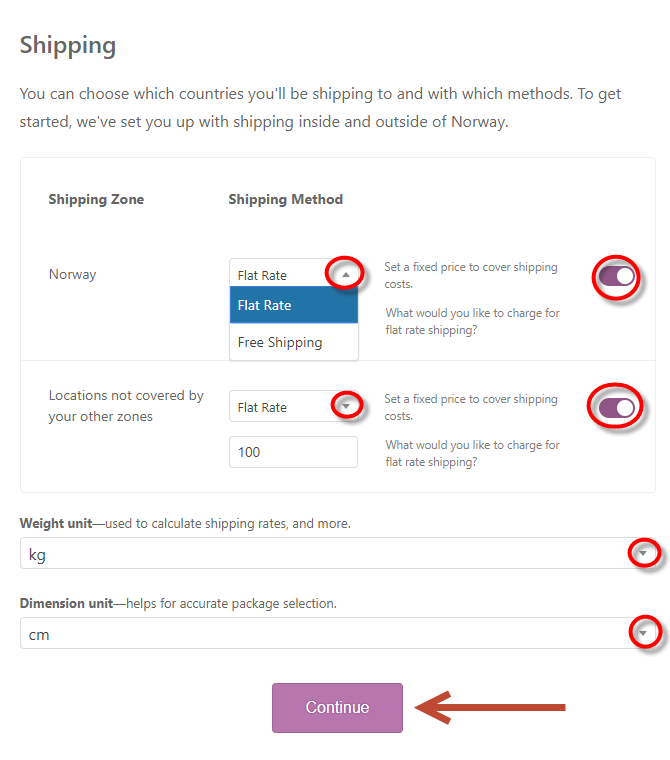
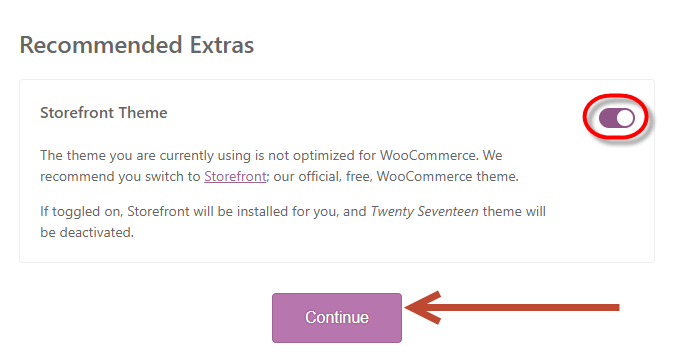
Some recommendations will come up (such as themes and plugins) for you to use but you don’t need to choose them now. You can just click on “skip this step“.
Once the wizard is complete, you can then start uploading your products.
See also our Woocommerce School for more tips. (Note that the school is only available in Swedish at the moment).
Themes
We provide Woocommerce’s own launch theme “Storefront” with your installation of Woocommerce. You can do this yourself under the menu item “Appearance” -> “Themes“.
If you want your online shopping to appear directly when you visit the page, select “Appearance” -> “Customize” and then “Homepage Settings“.
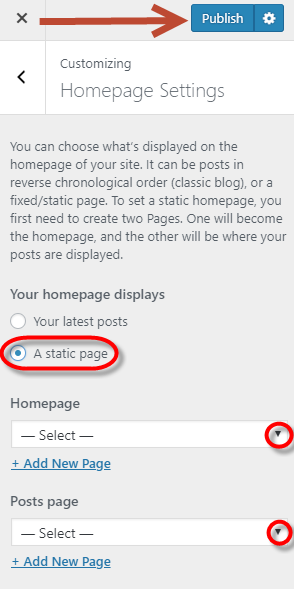
Other theme
If you want to add instead a brand new theme, click “Appearance” -> “Customize” -> “change” (next to the name of your theme up top in the next menu). You can apply for different criteria.
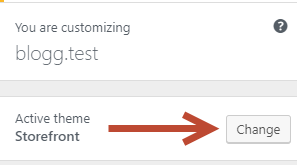
You can choose between “installed themes” or ” WordPress.org themes“. Once you’ve chosen the criteria and found the theme you want to use, simply click to install under “live preview” or on “install & preview” (live & preview) and then click on “activate & publish“.
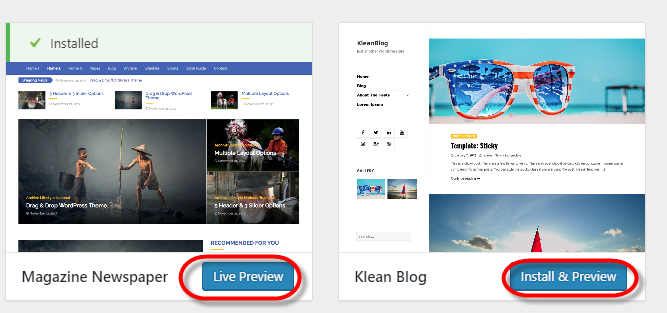
If you regret and want to return, you have to go to “Appearance” -> “Themes” where you can easily re-enable old themes.
If you have CSS skills, you can build your own theme or customize an existing theme. You can edit CSS directly from Dashboard under “Appearance” -> “Editor“.
Tip: WordPress works perfectly with other types of pages that aren’t just a blog. You can create static pages for blogs/new pages, for whatever you want, by clicking “Pages” -> “Add New“.
Tip: Keep in mind that WordPress is constantly updated with new features and security updates. Always keep your WordPress, your themes and your plugins updated with the latest version. If your theme/plugins are not supported by the latest WordPress version, then you should remove/replace these themes/plugins as it may pose a security risk to keep them and by that not be able to update your WordPress and there is risk of intrusion.
See also our Woocommerce School for more tips. (Note that the school is only available in Swedish at the moment).